Desert Online General Trading LLC
Dubai, United Arab Emirates
Desert Online General Trading LLC
Dubai, United Arab Emirates


Stay Connected, Stay Ahead! 📞
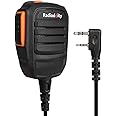
The Radioddity GA-2S Long Range Walkie Talkies are designed for professionals who demand reliable communication. With 16 pre-programmed frequencies, a robust 3-mile range, and a long-lasting battery life of up to 96 hours, these walkie talkies are perfect for business, retail, and school environments. The included micro USB charging and air acoustic earpiece ensure you stay connected effortlessly and securely.


| Item Weight | 1.47 pounds |
| Package Dimensions | 12.48 x 10.16 x 4.02 inches |
| Item model number | GA 2S |
| Batteries | 4 Lithium Ion batteries required. |
| Is Discontinued By Manufacturer | No |
| Warranty | 18 Months Warranty & Lifetime Support |
I**E
Good little radios for jobsite or camping
Tested these with my brother. We were almost exactly a mile apart on level ground, but with quite a few trees and houses as obstructions, yet I was still able to easily hear him. There was a little static at that distance, but the voice was still clear and easy to understand. A led on top indicates when the radio is transmitting or receiving.The antennas mount solid and so far the batteries have held their charge when not in use. Feels solid in your hand and the inputs are solid with covers that fit snug. Love that these can be charged either by micro USB or with the included charging stands. Batteries and clip snap in solid, although the clip seems a bit thin. Each radio came packed well in it's own box with all the advertised accessories included. Seems to be a good little set of radios.[Update - 2/3/2019] So I wanted to update my review to include some helpful hints for Windows users. Mac Users can skip down to the 'Chirp' section. If you are having trouble reprogramming these you may want to read on. Out of the box the radios work great, but I wanted to make them fully compatible with my Midland radios. Since the Radioddity's are programmable, I decided to alter their profile to fit the Midlands.Fixing the Missing DriverSo I plugged in the cable to the radio, then plugged it into the computer via the USB. The information balloon in the lower right popped up indicating it was installing the drives for the radio. However, the installation failed. Checking the Device Manager it was showing under "Other Devices" that a USB-Serial Controller was having an issue. I first thought it was a motherboard issue and I would need specific drivers from the manufacturer, however I later determined that it was missing a USB driver that was not part of the motherboard set, but missing from Windows itself.What you'll want to locate is the "Prolific USB-to-Serial Comm Port driver". Provided your system is 64 bit you want to find the PL2303_64bit_Installer.exe file. You can try ifamilysoftware dot com or you can find it on prolific dot com.tw with some digging.Installing this will add a port under the "Ports (COM & LPT)" in the Device Manager called "Prolific USB-to-Serial Comm Port (COM3)", but could be any COM other than 1. Mine was COM4 so make note of this as it will be important later. This should resolve the missing driver issue, but you can check to see if it appears under "Ports" in the Device Manager to be sure.ChirpNow that you have that installed and working, you'll need a program called Chirp. Chirp is how you will access the radio's currently programmed frequencies. It can be found on danplanet dot com in their download section. Download it for your platform. In my case Windows. It will highlight the installer file, so just download and install.Once that is done you can open Chirp, but there won't be much to see for now. Next connect the programming cable to the computer and then connect the other end to the radio.Programming the RadioOnce it's connected to the computer, you must then turn the radio on to obtain it's profile or upload one to it. Volume level does not matter, but I kept it low.Now click on the menu item labeled "Radio" inside the Chirp program, then "Download from Radio". You'll need to choose the COM port number I mentioned earlier, then select the radio make, then the radio model and click "OK". This will load the current channel profile programmed into the radio and display it in Chirp. This will not alter the pre-programmed frequencies. I suggest you make a copy of it in 2 ways though. One, go to "File" and "Save as" which becomes a '.img' file. Call it what you like. Maybe tag on the word "original" on the end so you know it's the radio's given profile. Next I would also export it as a csv. This way if you decide you want to manipulate it you can. I will go into that in a bit.Building a ProfileSo now you have access to the radio and it's up to you about what kind of profile you wish to build. As I mentioned before I wanted to match these with my Midland radios. If you search Google for a file named FRS-GMRS_channels.pdf, it will breakdown what can and can't be used. Please note that you can create a profile with the frequencies in any order you wish, but the radio will refer to them in numerical order.With FRS frequencies you do not need a license. If you use GMRS over 0.5 Watts, then you'll need a license to use any of those channels. Since these radios are 2 Watts, the GMRS channels would be considered illegal to use. So I just programmed my radios with the FRS Channels so I didn't have to worry about any of that.If you want to view a prebuilt profile of FRS and GMRS frequencies you can go to "File -> Open stock config -> US FRS and GMRS Channels". You could do a "Save as" and build your radio profile from there if you wanted. Just open the program in notepad or csv program and simply manipulate the data to your liking.If you like a tone that chirps at the end of your transmissions, you can go down the "Tone Mode" column and double click the word "None" and choose "Tone" there.Once you have your profile built, you can choose "Radio->Upload to Radio" and you will see it clone the data to it. That's it, your radio is reprogrammed. Unplug the cable and turn the radio off. Now programming the second radio is easy, just connect the cable, turn the radio on, choose "Radio->Upload to radio" and that's it. Now unplug that radio, turn it off then back on. Turn on the first radio and test. If you did everything right you should have a matched set.Don't worry if you don't get the frequencies right the first time, you can always update the profile and upload any needed changes as many times as you need to.Well I hope that helps anyone who might have been stuck or had questions on just how to program the radios. I am not a Chirp expert so I don't know much about it, but there is some great documentation on their site if you want to dig into it more.
M**H
Great Radios at an incredible Price!
So far so good! They work very well! Very good for the price!
W**M
USB charging seals the deal
This is remarkably a solid little UHF radio. Easy to program with Chirp. USB charging seals the deal. Now I can pack six of these in the small Harbor Freight Apache hard case and not have to worry about including the desk charger or wall-wort. When dispersed out for field work most people already have a way to charge from USB-micro, or it's easy to find, and they know how to do it without much training. These radios are part of a go-kit for our CERT team to match our portable repeater. If you do comms for CERT then you know there are a good number of new hams that don't always know how to use their radios. This way we can hand them a simple 16 channel locked HT and send them on their way. With the price of about a dozen bucks per radio, loss of a few is not a big consideration.The guts of the radio seem based on the BF-888 and program like that on Chirp. The voice announcement for channel selection is clear and very helpful for old eyes. The audio is strong and clear. They have no issues working with repeaters. The full band coverage allows for monitoring of UTAC and IR channels. At 2W I suppose one could use these on GMRS without annoying anyone. The most important thing to remember is that these will need to be programmed, otherwise you'll be transmitting blind.
T**C
Good radio for money but need programing cable when purchased
Good radio, worked out of boxtho of course batteries needed charging ( good feature to charge from any usb cable )But users be ware that in order to change channels you need to buy the programing cable too. Most of the freqs may not be usable for the average person unless licensed or for special public services. So buyer bewareI even dropped one and no damage occurred so they are solid enough for the moneyAudio good and loud, ear piece not the highest quality but works. Range for wooded level ground over 2 miles for me.Overall a 4/5.BTW, looks like programing cable is half price now if bought at same time as radio... great!Stock Freqs out of box are as follows;Location Name Frequency Duplex Offset Tone rToneFreq cToneFreq DtcsCode DtcsPolarity Mode TStep Skip Comment URCALL1 454.225 0 TSQL 88.5 69.3 23 NN FM 5 S2 454.325 0 TSQL 88.5 100 23 NN FM 5 S3 454.425 0 TSQL 88.5 151.4 23 NN FM 5 S4 454.525 0 TSQL 88.5 203.5 23 NN FM 5 S5 454.625 0 TSQL 88.5 241.8 23 NN FM 5 S6 454.725 0 DTCS 88.5 88.5 23 NN FM 5 S7 454.825 0 DTCS 88.5 88.5 23 NN FM 5 S8 454.925 0 DTCS 88.5 88.5 23 NN FM 5 S9 455.125 0 DTCS 88.5 88.5 23 NN FM 5 S10 455.225 0 DTCS 88.5 88.5 23 NN FM 5 S11 455.325 0 DTCS 88.5 88.5 23 NN FM 5 S12 455.425 0 DTCS 88.5 88.5 23 NN FM 5 S13 455.525 0 DTCS 88.5 88.5 23 NN FM 5 S14 402.125 0 88.5 88.5 23 NN FM 5 S15 435.55 0 88.5 88.5 23 NN FM 5 S16 468.95 0 88.5 88.5 23 NN FM 5 S
Trustpilot
3 weeks ago
1 week ago