We remain fully operational. Our teams are working around the clock to ensure your deliveries continue safely.

DOWNLOAD THE APP


Customer Services
Copyright © 2025 Desertcart Holdings Limited
DOWNLOAD THE APP
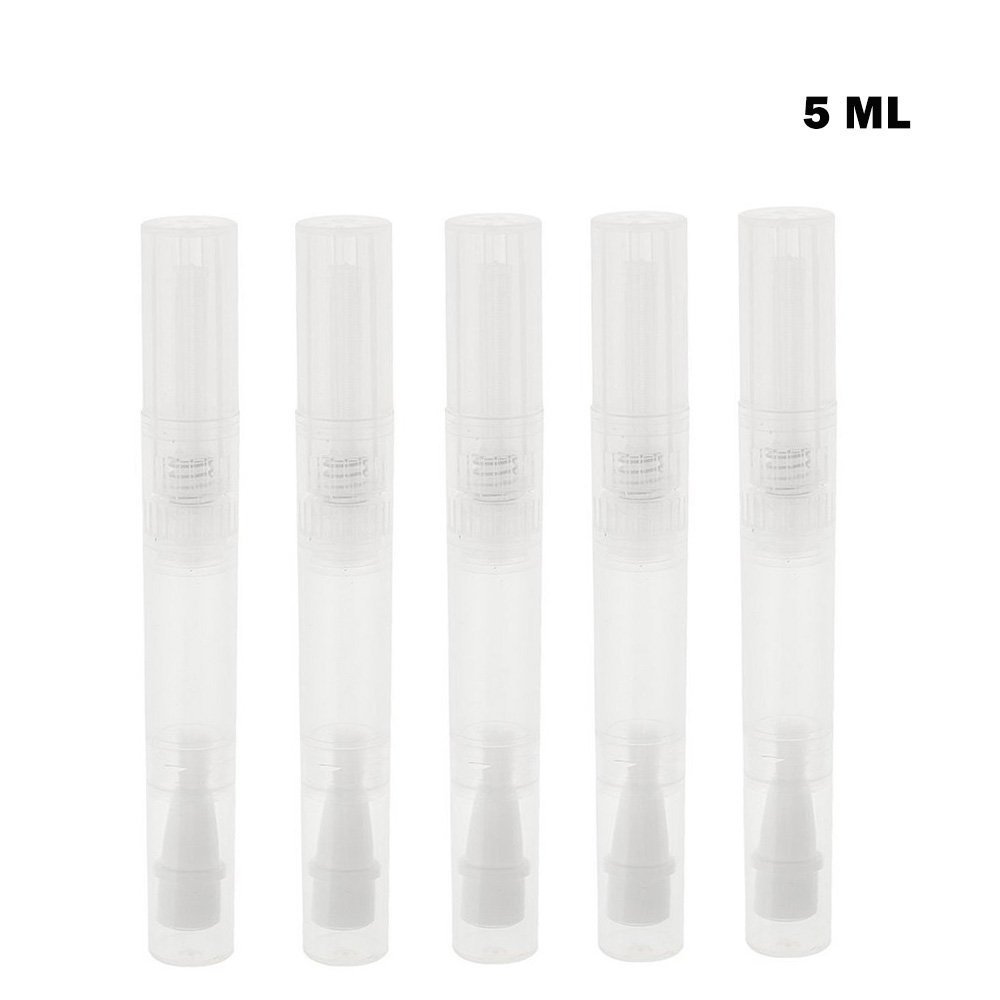
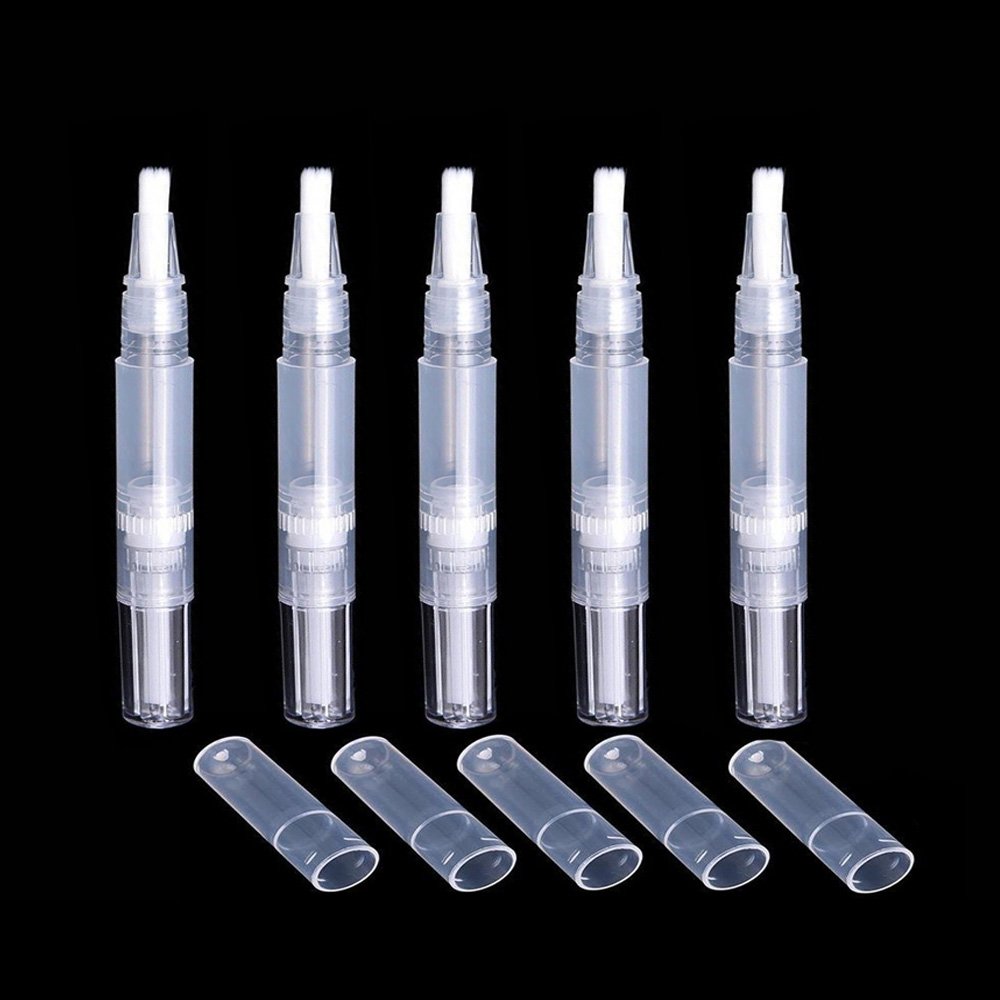


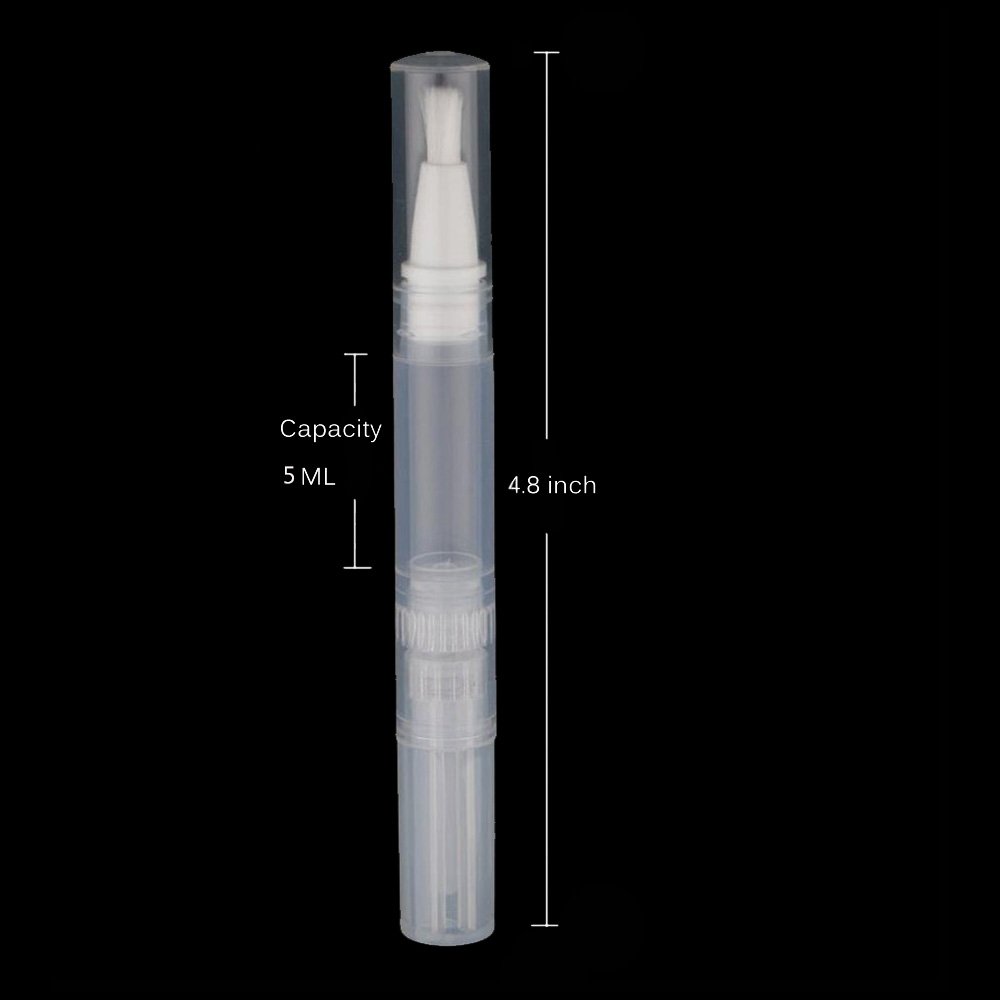
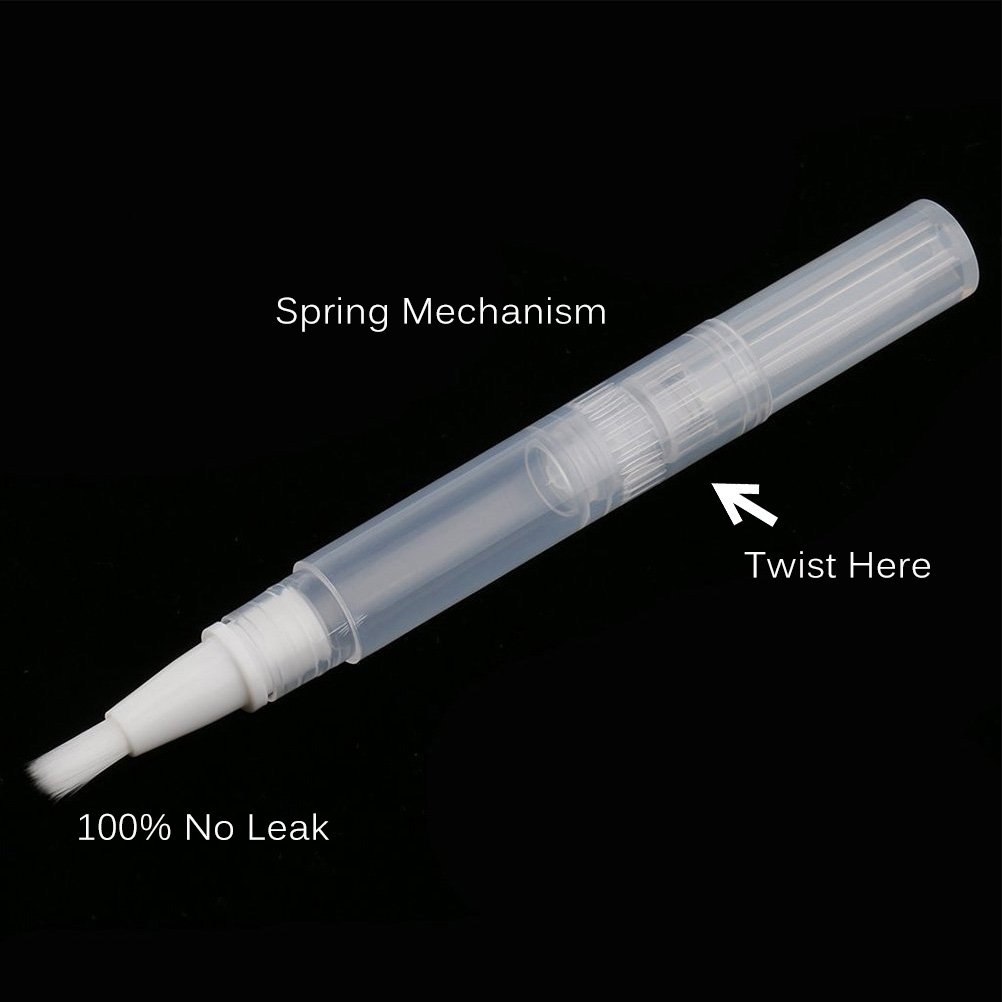

Description: Very easy to fill and very easy to use Available anytime, anywhere and very easy to carry Can be used for filling lip gloss, nail nutrition oil, essential oils, nail polish, eyelash growth, perfume, etc Fill with liquid and then install the brush Cover the cap after use Specification: Length: approx 12.2cm / 4.80 inch Material: Plastic Color: Transparent Capacity: 5ml Package Includes: 5 Pieces x Empty Twist Pen Please Note: This product is not suitable for filling acid alkaline or higher alcohol concentration liquid. Do not twist the pen to the top, it will be unable to twist back for filling once twisting to the top.
C**I
Five Stars
I love that these are so big! Perfect if you use cuticle oil all the time.
D**.
Five Stars
Very happy with these. Will recommend and will buy again
L**A
Five Stars
Great pens, easy to use!
B**N
Not refillable
There's a way to refill them but they are not meant for more the one use.
M**Y
Good quality
Good quality
D**.
Large but I was in charge!! :o)
I bought these because my Bliss Kiss oil pens can't stand up to my constant use. I open them and refill every 3 days, so I needed a higher volume holding pen. So here it is, the T and nothing but the T: These pens are HUGE and I love that. It holds 5ml of my cuticle oil with no problem. Besides the huge amount of oil (or makeup what ever you wish to add) the pens hold, their major plus is the brush tip! It is soft yet firm enough to push those cuticles and the bristles get to the crucial cuticle area and under. But wait there is more! There is a whole in the middle where the oil comes up. When you turn the clicker to get more oil you can SEE the oil coming up through the middle! One click a little to moisten, two clicks and you can bath the nail plate, three clicks and WHOA MOMMA! You get to soak the cuticle, the nail plate and under the tip/free edge of the nail! I really love this brush head and I prefer it to Bliss Kiss pens (Sorry Ana).The con's: They absolutely are hard to get open from the back, hard but not impossible. I believe the manufacturer intended for the pen NOT to be opened and reused, but I don't have money to waste buying bags of pens every month, so I opened it. The first picture you see is how the pens arrived (minus the one I took out to take apart) there are 5 pens in total. I gave you a picture of the victim pen (lol) out of the package. The third picture shows that this pen stood no chance against me because as you can see I took it apart. It has 6 pieces when disassembled. And that is what I want to go into how to make that happen.HOW TO TAKE THEM APART 1. You will need something to pry the back/turner off. I used my multi-tasking cuticle pusher (see pic 4), the scraping end. You will need ALOT of force, so if you don't have the strength ask a male to do it for you. You want to put whatever you are using right into the thin thin space between the plastic casing and the crystal clear turner, you will see the rounded part on the clear turner. You want the tool UNDER that part. 2. Once you get that turner up and off you want to remove the WHITE twisty coil that fits onto the grooved stick that is PERMANT (it is affixed to the turner cap and does NOT come out, so don't pull it!). DO NOT lose the white twisty, your pen will not turn right if you do put this part back in. 3A. Once the white coil is removed you can then easily remove the plunger that pushes your oil towards the brush. BUT DO THIS STEP FIRST: 3B. I purposely wound mine like I would to get more oil and put the pen into refill mode. Now you have to get it back into "oil put out" mode. You need the turner cap for this very important step! Insert the grooved stick into the BACK stalk of the plunger. The grooved stick/turner cap will fit right in, but it will not lock down. DON"T close the cap all the way or you are back to step one! Once the two are joined you can proceed to "rewind" the plunger turning it to the left until you have brought the plunger's pushing end back up to the top. Now you can remove the plunger. 4A FILL with your oil or makeup. 4B. REASSEMBLE. Take the white twisty coil and insert it into the clear turner cap OVER the stationary grooved stick. Make sure that the zig zag shaped part of the white coil is exposed, otherwise your pen will not turn! 5. Put the turner cap assembly into the back of the plunger turner ensuring that you have placed it properly into the zig zag grooves in the bottom of the plunger. Press it all together FIRMLY to close.If you have used an oil pen before then this next part is no surprise, but: Turn the pen upwards with the brush pointing to the top. You need to remove the air bubble that appears after assembly. You want the pen perfectly vertical, now turn the turner to the RIGHT until you see the air bubble disappear. NOW you are all good to go!I know some are thinking "Why not fill it from the brush end?" and you can! HOWEVER once the pen is emptied you will need to rewind the plunger, and for that to happen you have to take it apart. And you will want to know how to do that, or spend $8 bucks plus tax when you run out of the other 4 pens ;o) Hopefully I save someone some money lolThis should be apparent but, this item lost a star because it is so darned hard to open! I just KNEW I was going to break a nail. But I am not a quitter and I made it happen with my nails still intact. This kind of product should be refillable. I will eventually have to buy more pens, but that won't happen until the brush starts to get wrecked by fraying and dust.I hope this helps you and if you have any questions I am more than happy to answer them :o)
Trustpilot
4 days ago
1 month ago