
DOWNLOAD THE APP


Customer Services
Copyright © 2025 Desertcart Holdings Limited
DOWNLOAD THE APP

⬆️ Lift your Jeep, lift your adventure — stand out on every trail!
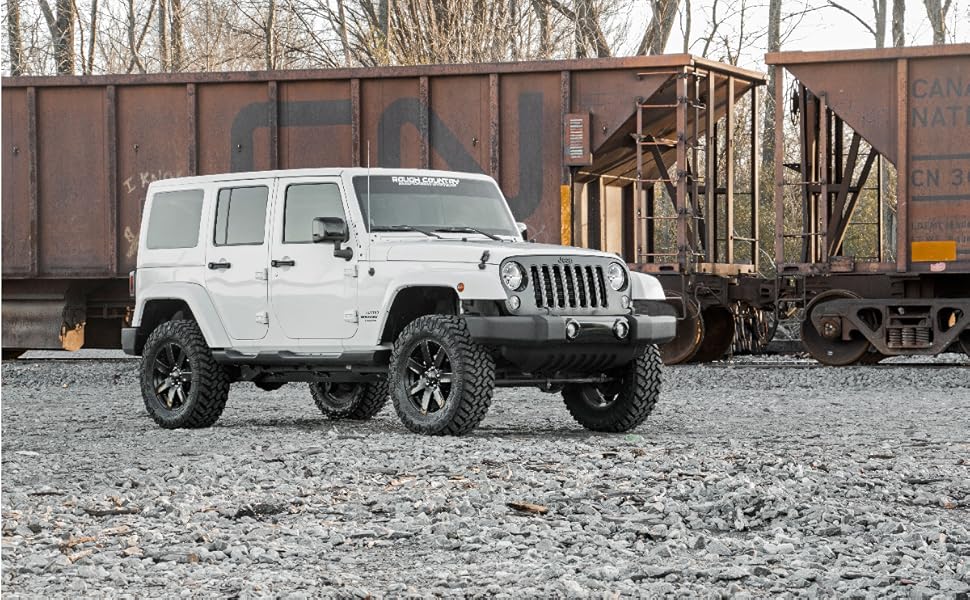
The Rough Country 2.5" Series II Lift Kit for 2007-2018 Jeep Wrangler JK delivers a perfect balance of enhanced off-road capability, durability, and style. Featuring a bolt-on installation with no drilling required, it raises your Jeep by 2.5 inches for improved ground clearance and tire clearance up to 35". Its spring retention design ensures coil springs stay securely in place during extreme articulation, while the included rear track bar bracket keeps the rear axle centered for optimal handling. Constructed from alloy steel and aluminum, this kit is backed by a limited lifetime warranty, making it a reliable upgrade for serious Jeep enthusiasts.


| ASIN | B0777YVQWL |
| Auto Part Position | Driveline |
| Automotive Fit Type | Vehicle Specific Fit |
| Best Sellers Rank | #237,411 in Automotive ( See Top 100 in Automotive ) #413 in Automobile Chassis Body & Suspension Lift Kits |
| Brand | Rough Country |
| Construction | Drilling Required: No |
| Customer Reviews | 4.5 4.5 out of 5 stars (538) |
| Date First Available | January 17, 2013 |
| Exterior | Machined |
| Global Trade Identification Number | 00843030111564 |
| Included Components | (4) 2.5" Coil Spring Spacers, Brake Line Relocation Bracket, Extended Sway Bar links, Hardware, Track Bar Relocation Bracket |
| Is Discontinued By Manufacturer | No |
| Item Weight | 17.69 pounds |
| Item model number | 635 |
| Manufacturer | Rough Country |
| Manufacturer Part Number | 635 |
| Material | Alloy Steel, Aluminum |
| Maximum Lifting Height | 2.5 Inches |
| Model | 2.5" Series II Lift Kit |
| Product Dimensions | 28.75 x 6.25 x 7.5 inches |
| Special Features | 35" tires will clear but rubbing may occur with extreme articulation, If planning on running 35" tires on factory wheels, double check clearance between the front tire, lower control arm and sway-bar links. |
| UPC | 843030111564 |
G**N
Here's your tool list and a couple tips
Great Product, quick shipping. You need more tools than it shows on it's tools required list. You will want to install the rear first. When you are doing the brake line extension brackets, you will need a 7/16 socket, and wrench to install the brake line bracket to the extension bracket. You will prefer a 10mm socket for removal in re-installation of the bolt that goes into the frame. When you hit the point where it tells you to remove the lower bolts for the rear sway bar end links, you will need to remove the whole thing, to install the new ones. At this point, if you do not have an impact wrench, take the top off first (19mm wrench on ball end, and 18mm socket on nut end), otherwise you'll be fighting it flopping around while trying to remove the torque nut. if you have impact wrench, remove the bottom first so you can get access to the tops with the impact wrench. Installation of the spacer is not easy, it's very tight quarters above the frame. hold that bolt and spacer up there and try to spin that nut onto it from the top. Here, an impact wrench will help you keep your sanity. trying to hold a wrench up there above the frame, in the pocket on a torque nut that's welded to a disc, while simultaneously trying to tighten a long wobbly assembly of the weighty spacer and a bolt just doesn't go smoothly. When you hit the point that you will be reinstalling the springs, I had to use a bottle jack between the axle and frame on the passenger side to push the axle down far enough to get the spring in. It doesn't tell you in the tools required list, that you will need a 13/32 drill bit to drill a hole into the horizontal surface of the bracket for the rear track bar. I used a 7/16, worked fine. you'll also be needing 9/16 wrenches and sockets at this point. When doing the front, I got to the shock brackets last. the new bolts I had left over didn't fit the crush sleeves, and they wouldn't even thread into their nuts. You will have left over bolts from the sway bar end link swaps, I used those, it worked out much better. The driver's side brake line bracket mounted at the axle by one 10mm headed screw was necessary to remove to gain enough droop on the axle to get the spring in. It re-installed fine. The driver's side brake line bracket at the frame, for the extension bracket, yeah, that was a bear.... I separated the axle breather hose and the other line from it and bent the hard brake line down, to gain the necessary stretch to bolt the extension in. The instruction called for the vehicle to be on the ground to do the sway bar end link connections. My driveway isn't flat, I do it in the air. that way I can raise or lower the axle as needed to line up the last bolt connection. Tool list should include the 13/32 drill bit, 19mm (also known as 3/4) wrench and socket(regular and deep), 18mm wrench and socket (regular and deep), 21mm wrench and socket, 16mm wrench and socket, 14mm (also known as 9/16) wrench and socket,13mm (aka 1/2) wrench and socket, 7/16 wrench and socket, 10mm socket, and a compothane hammer helps move things around without damage.
A**R
A little tricky, but not too bad of an install.
I think it really should be closer to a four star rating, but for the cost and time it took I’ll give it a five. One irritating thing is the kit is all with standard threads, while the Jeep is all metric. I hate metric, but I hate even more is going back and forth between the two constantly. The job goes much quicker with an impact driver and wrench (love my Milwaukee tools for this). Also I discovered my jack stands weren’t tall enough to use on the frame, so I scarily used my rv’s leveling jacks to suspend the Jeep. Instructions were adequate. For installation pearls, here’s a few. Although the instructions start on the front, go with the rear first, as you’ll need the rear sway bar links to repurpose for the front. Slide the crush sleeves onto the bolts first before trying to mount them on the new sway bar links. I didn’t do this first and the small amount of banging with a brass hammer screwed them up badly to the point that the bolts wouldn’t go through without some coaxing. Which then damaged the threads and I had to chase the threads. Also on the driver side the bottom sway bar nut won’t be able to get past the new traction bar mount without grinding a little off the built in washer. I ended up using the old sway bar nut and bolt for this (and why did Jeep use two different threads for the sway bar link?). Mounting the new rear spacers is difficult. If you have short fat fingers....get help. You will find a way to hold down the top washer nut with a finger, and the spacer also has a vertical gap which allows you to see where the bolt is to line them up. Use a six inch extension and stuff something in the bottom of a 3/4” socket to get the bolt up high enough to hand screw in initially. It also helps to have a thin offset 3/4 wrench to hold the top nut while tightening it. The front brake brackets were too long, so I drilled another hole for them. Rears were fine. A coil spring compressor (use a macpherson strut one) isn’t a must, but it certainly helped a bit one the rear ones. The front coil springs were much easier to re-install and didn’t need the coil spring compressor. I stepped down on the driver side brake caliber, which was enough to get the coil in, then used a jack at the driver side spindle to raise it, which lowered the passenger side enough to mount the coil spring. The lower front shock brackets don’t fit well, and some minor bending will be needed to coax them into place. Had to bend them out a little to get them to fit over the old mount, then screw in the vertical bolt, then had to bend them out a little more to get them to let the shock eye to fit. Once it’s tightened, the mild flaring is fixed. Overall it wasn’t too bad of an install. I’ve been a shade tree mechanic for 35 years, restoring old cars and repairing new ones, and this probably took a little longer because 1).my tools are all in a back shed about 400 ft from my driveway (wife got the front garage), and I probably made several trips since I had no clue what I really needed. 2). Had to figure out how to minimize going under a vehicle not supported that well since I didn’t have tall enough jack stands. And 3). Wife and kids were home, so foul language wasn’t available to quickly vent frustrations and had to stay quiet.
P**O
Nice Lift kit and great price
This set worked perfectly with my 2014 JK. All pieces came packaged really well. The only issue to be on the lookout for is if you have metal brake lines vs rubber hoses. My brake lines were not flexible so the reposition brackets for the break lines I could not use. Luckily I know a great mechanic that created a custom bracket for the front and rear. So I still give this set 5 stars. No noise, and a handles well. I’m installing a dual stabilizer next as the height in ride will require a tighter steering system. Over all everything is good so far.
A**R
This lift fit perfectly and was easy to install. I had no issues with braking and steering as stated in a previous review. Had to adjust the steering so the steering wheel was straight again. The Rough Country lift was made with quality materials and good quality hardware. I highly recommend this lift.
A**R
Half-way through installation the bracketry was found to be setup for a left hand drive vehicle, subsequently costing a great deal more to modify and install. Parts appear to be shipped from the USA, so we had no option.
S**E
Best suspension kit ride like original suspension
J**O
Es muy bueno si llega
L**.
Shocks leaked from day 1, rear relocation bracket is on held by one small bolt that always breaks
Trustpilot
2 weeks ago
2 weeks ago