Desert Online General Trading LLC
Dubai, United Arab Emirates
Desert Online General Trading LLC
Dubai, United Arab Emirates

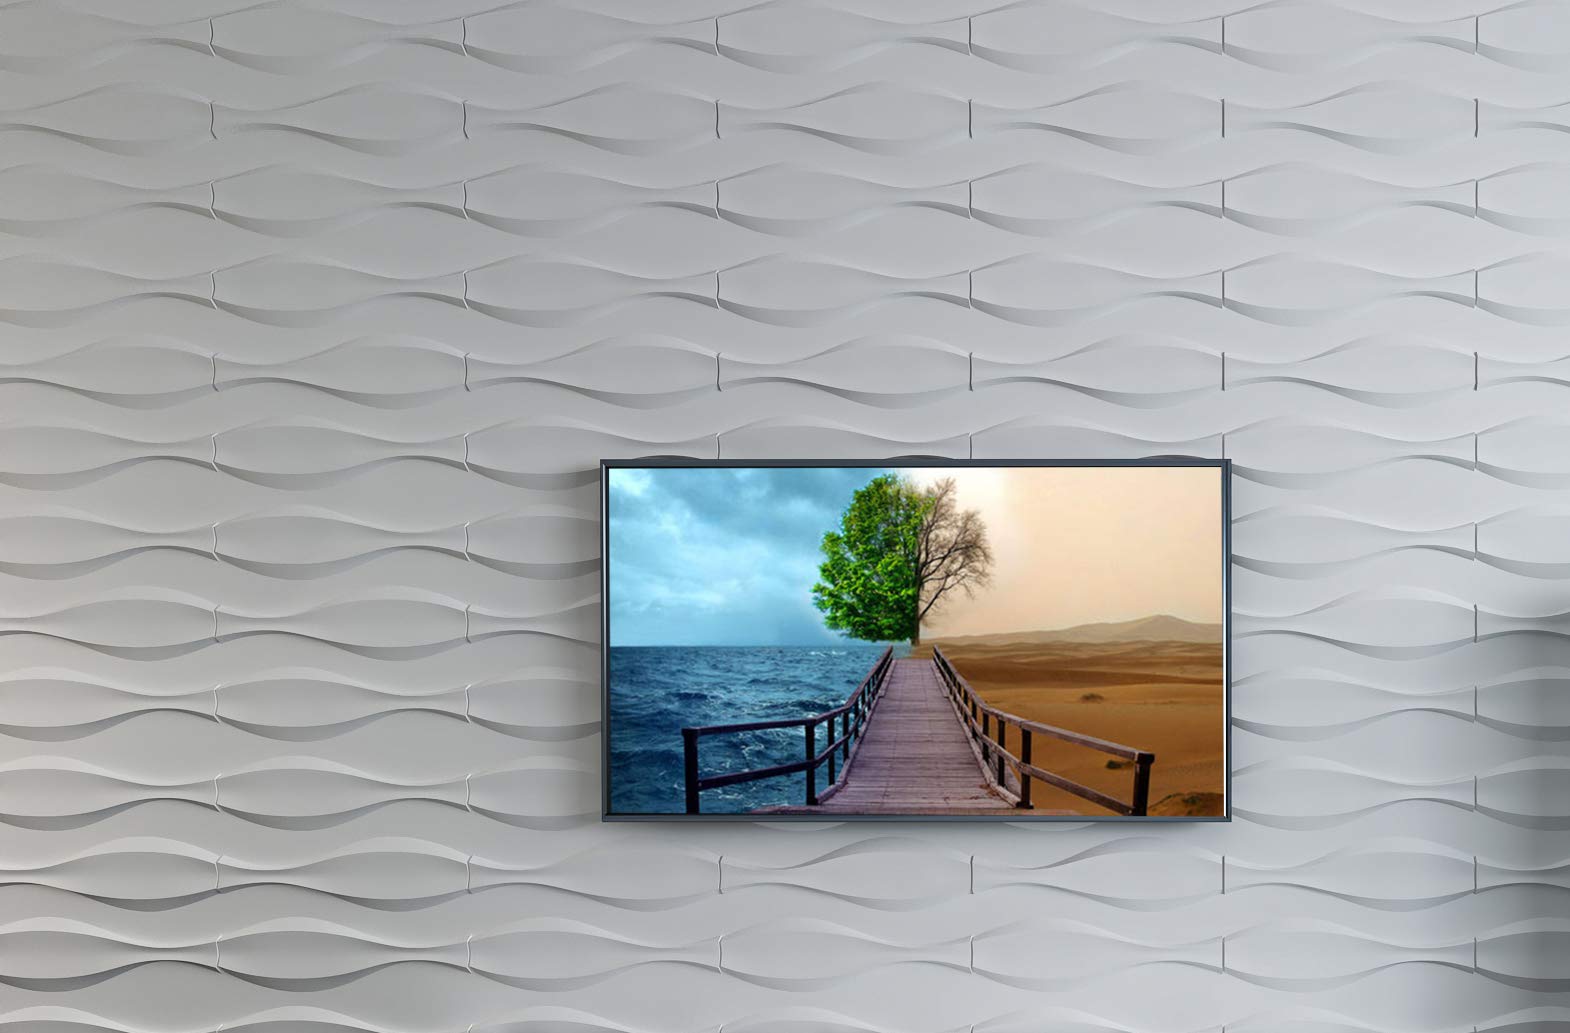

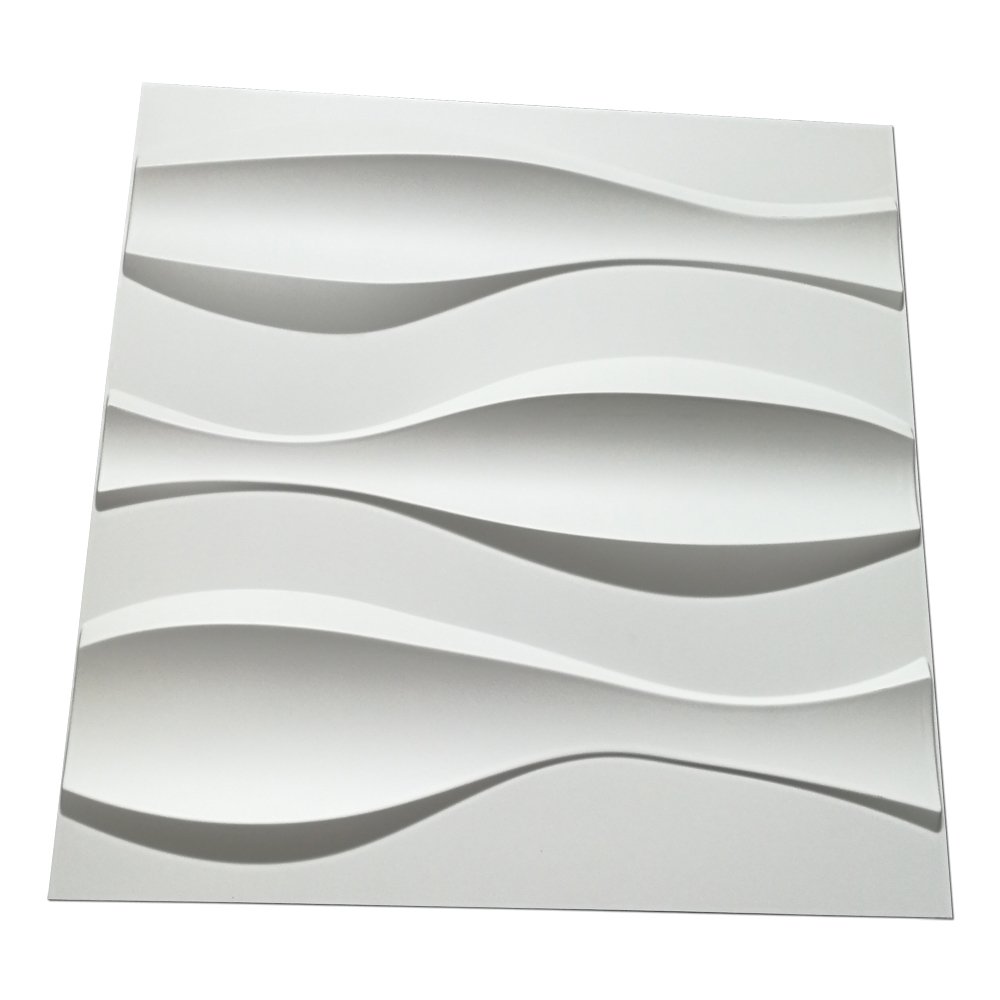
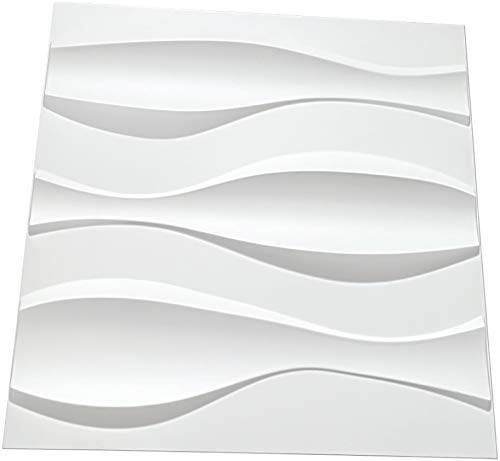
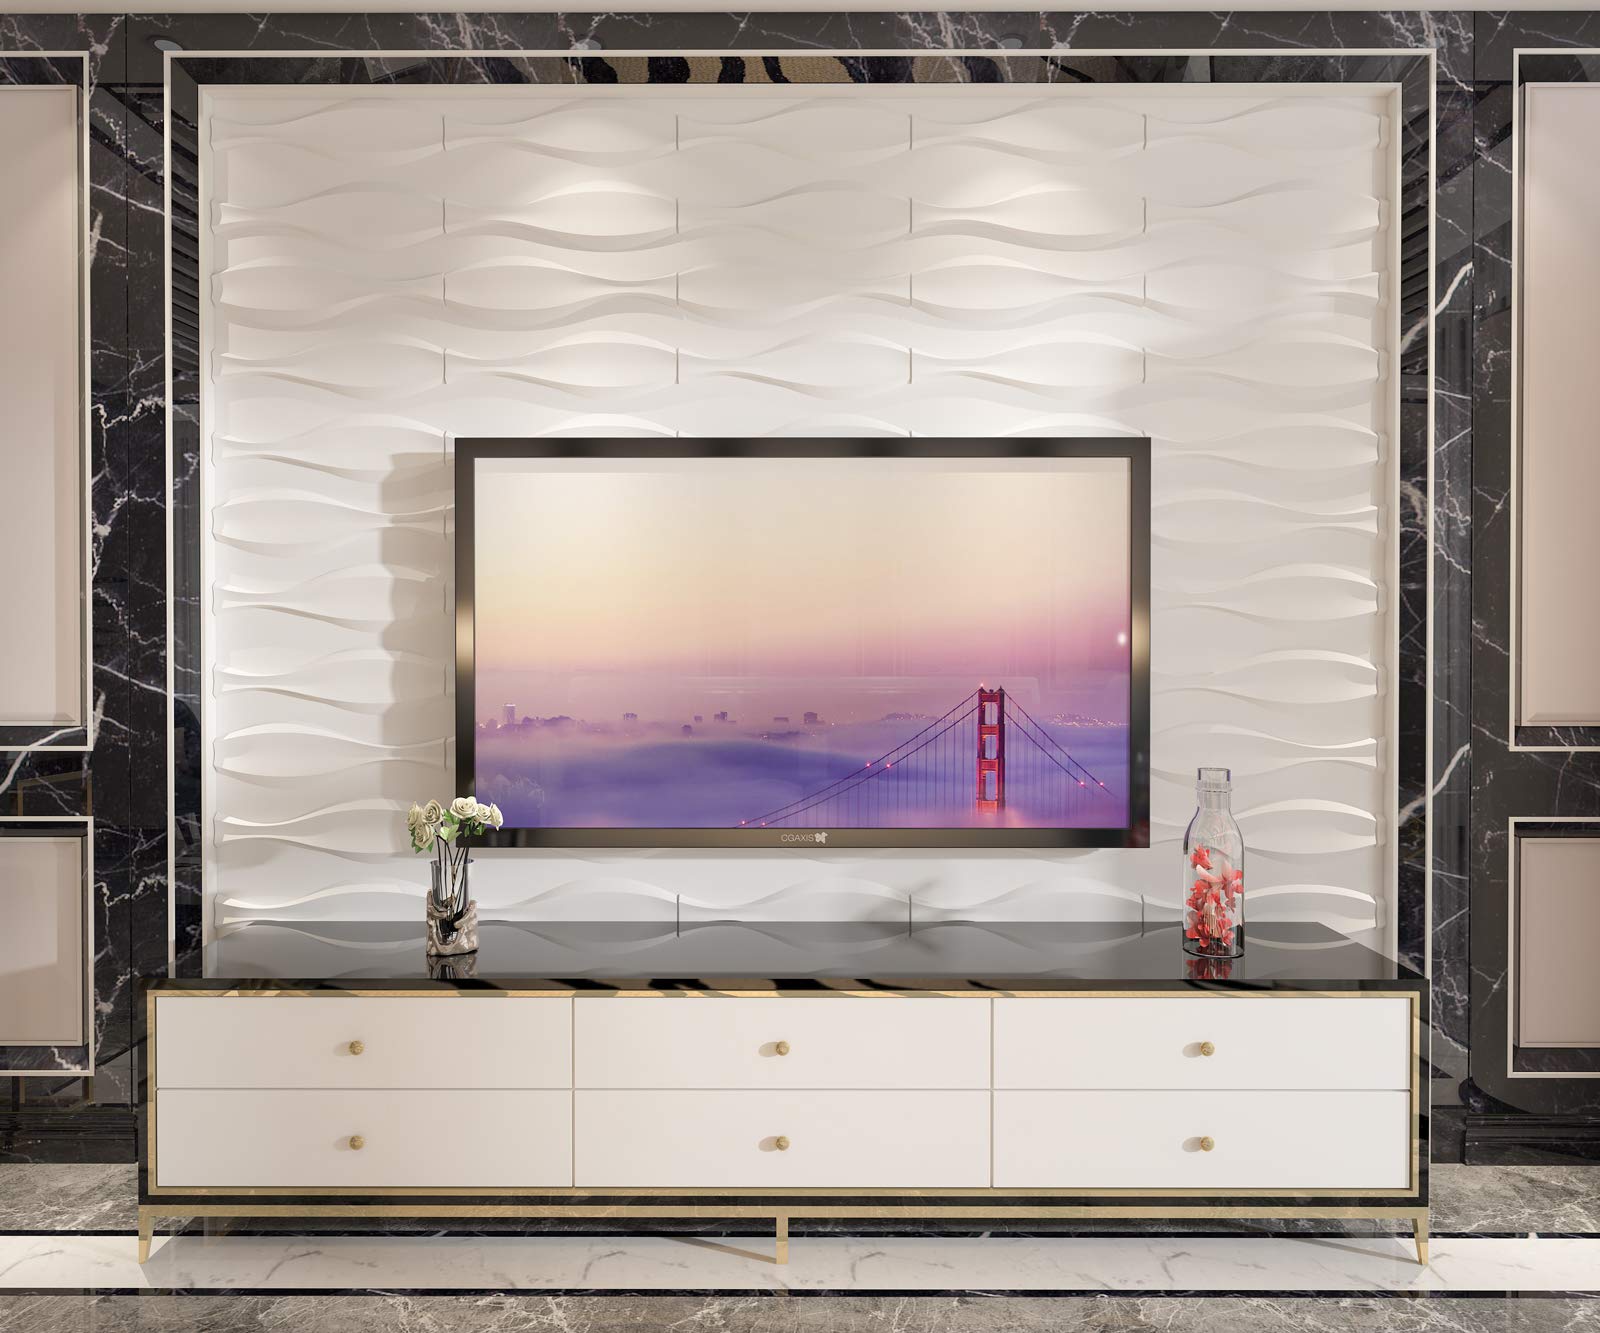


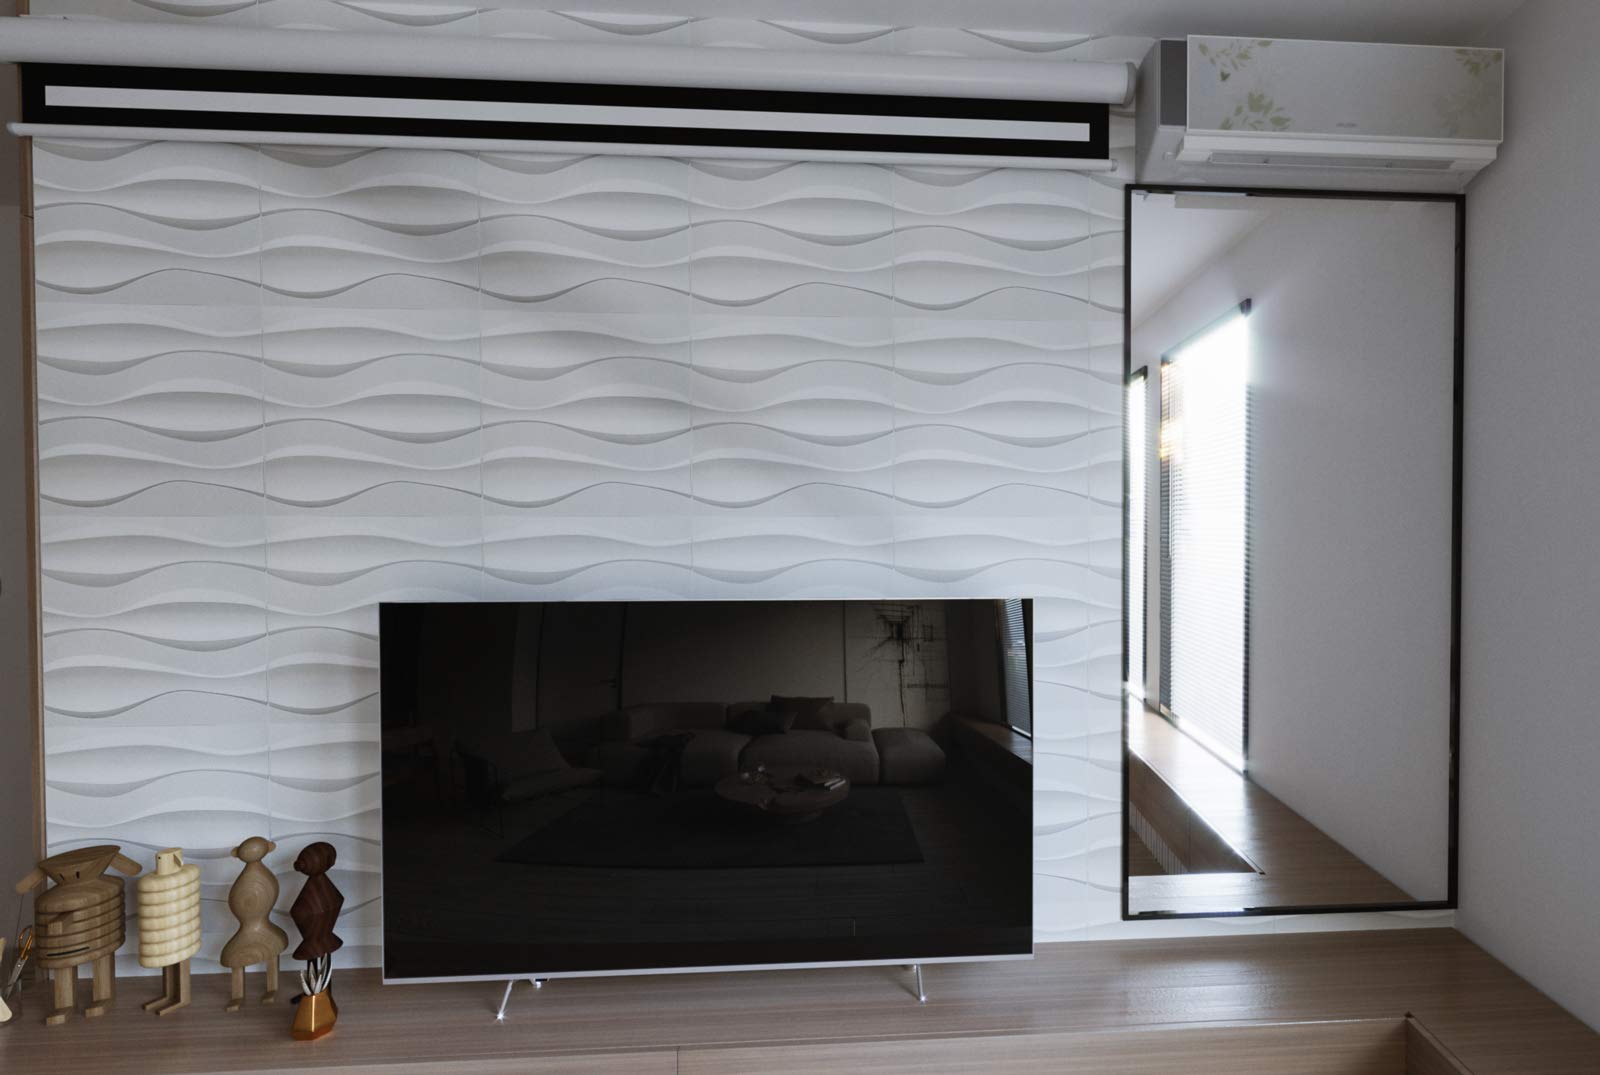
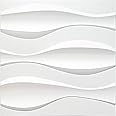
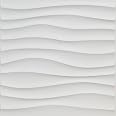
🌊 Ride the wave of modern design with Art3d’s sleek 3D wall panels!
Art3d’s 19.7" x 19.7" Wave Wall Panels come in a pack of 12, covering 32 square feet with lightweight, fire-resistant PVC. Designed for easy DIY installation, these matte white panels add a stylish 3D wave texture ideal for living rooms, bedrooms, kitchens, and feature walls, backed by a 2-year manufacturer warranty.


| Material | Plastic |
| Color | Big Wave |
| Brand | Art3d |
| Style | Wave |
| Item Weight | 1 Pounds |
| Product Dimensions | 19.7"L x 19.7"W |
| Pattern match | Straight Match |
| Theme | Space |
| Is Stain Resistant | Yes |
| Unit Count | 32.0 Count |
| Manufacturer | Art3d |
| UPC | 712809591435 |
| Number of Items | 12 |
| Installation Type | Non-Pasted |
| Part Number | A10035 |
| Item Weight | 1 pounds |
| Item model number | A10035 |
| Is Discontinued By Manufacturer | No |
| Size | 19.7" x 19.7" |
| Shape | wave |
| Item Package Quantity | 1 |
| Number Of Pieces | 12 |
| Coverage | 32 square feet |
| Included Components | No |
| Batteries Included? | No |
| Batteries Required? | No |
| Warranty Description | 2 year manufacturer |
Trustpilot
2 months ago
3 weeks ago