We remain fully operational. Our teams are working around the clock to ensure your deliveries continue safely.

DOWNLOAD THE APP


Customer Services
Copyright © 2025 Desertcart Holdings Limited
DOWNLOAD THE APP

🛠️ Elevate your woodworking game with precision, power, and pro-level workspace!
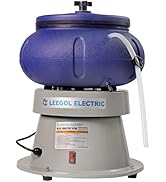
The Leegol Electric Benchtop Router Table features extra-large 8"×18" extension tables for expanded work area, a retractable transparent guard for chip control, and supports routers with up to 6-inch base plates. Crafted from rustproof aluminum alloy and heavy-duty steel, it offers durable stability and precision with a multifunctional fence and exact miter gauge—perfect for millennial pros seeking reliable, high-performance woodworking tools.


| Brand | Leegol Electric |
| Horsepower | 1.5 Horsepower |
| Item Weight | 7.98 Kilograms |
| Material | Alloy Steel, Aluminum |
| Power Source | Electric |
| Product Dimensions | 34"W x 15"H |
A**E
Perfect router
This router table deserves 5 Stars! I understand why some people give it less than five stars and its only because the directions are worthless. They do not tell you what is included in the package and which screw goes where. But, with a little common sense you can figure this out on your own. The one nice thing they did do is package each set of screws by itself. Meaning, all the screws that hold the leg and the extension table together to the tabletop are in a sealed clear plastic baggie. All the screws that go to hold the fence guards up are in their own plastic baggie, and so forth. Having said this, by orocess of elimination, the packet that contains 16 sets of screws, washers, nuts, go into holding the extension tables and legs to the router table. In order to get a nice flat surface with the table and extension tables, you have to do this with the router table face down along with extension tables face down. This will ensure that your work area is level and flat. There are a set of four holes per leg. Next, the packet of screws that contains a weird long metal thing, that is for holding your router to the underside of the table. You just use them as clamps and one of each of the long screws goes through one of the four holes on the table. You will see a very blurry picture of this in the instructions booklet, but again very worthless because it doesn't show you exactly how to place these clamps. I was a little nervous wondering if I had secured it well enough. But as long as you can't move your router around then you are fine. The next packet of screws should just have to Shorter screws with butterfly nuts and washers, those go to hold your fence to the table. The rest of the screws are to hold your fence guards to the fence. This is the simplest way I can explain it. Next, slide some spare pieces of wood back and forth along the tabletop. I noticed that there are some black pieces of aluminum that stuck up from the tabletop from production and they were leaving black marks on my wood. Once I knocked down all those little pieces of metal that were poking up, there were no more black marks. My dad suggested using some sandpaper to just knock down all the edges of the raised tabletop to make sure that didn't happen again, I thought that was a good idea but just sliding some old wood across the top was enough to knock all the edges down. And that's it! I absolutely love this tabletop. I love that it's made out of metal so I can leave it on my porch. My old router table was made of a laminated MDF and once the laminate cracked a little bit it started swelling up. This made for a horrible time getting precise cuts for my cabinet drawers! No warping on metal! Also, I read some people complaining about plastic guards, my old router had plastic guards as well and it was just fine. It's not some flimsy plastic. It's a very strong plastic fence just like most other routers have, you will not be disappointed. It held strong while I passed many pieces of wood through . Totally worth every penny I paid for this and some!
A**R
Will your router work with this table??
Great value but could have better instructions. Only 3 mounting holes to attach router. Directions say if the holes don't match up get a different router! Well my Porter Cable did not match so I drilled and counter sunk 3 new holes to work with my router. The directions do not mention the hole pattern so you won't know if your router will work without modification.
J**O
Who needs directions?
Let me start out by saying this is a fantastic beginner table for the price. I got it on sale and it's so far, done exactly what I needed it to do. Like everyone else says the directions are... not good, but if you have a bit of common sense and are used to putting things together, you'll do great. It came packaged very well with no issues. Nothing was damaged internally. Pieces include all the hardware needed (I had no extras), table itself, fence, left and right extension pieces, 4 legs, 3 feather guides, switch for front (has one 3-prong outlet in the back of the switch, so you can use the button on the front for power control), a 4 pack of plastic throat plates, and a pretty cheaply made miter gauge I don't see myself ever using... but I do appreciate the addition just in case. I'll try to put photos up in order as I describe things; I included the two main pages of the directions so you can see what you're dealing with before purchasing. You can just throw that pamphlet away... besides a bit of humor they don't necessarily help and can actually be more misleading than anything. I laid everything out as they were packaged. You'll get 4 main bags of hardware. One bag will have 16 nuts, washers and phillips head screws. Those are soley for connecting the router table to the legs and side extensions. (flip table and extensions upside down make sure the extension arms are on the outside of the table, place the 4 legs on the inside of the table and screw them together.) One bag will have 2 L shaped slide blocks, 4 matching plastic knobs, 6 bolts, 6 washers, and two extra knobs that are not like the others. The 4 matching knobs, 4 bolts, and 4 washers are for two feather guides that attach to the fence, which is pretty straight forward. The 2 extra unmatched knobs, 2 L shaped blocks, 2 extra bolts and washers, go to attaching the front feather guide to the table. One bag will have 2 washers, 2 knobs, and 4 phillips head screws. (be aware there are two lengths) This bag is for attaching the fence to the table and the front switch to the table. One bag will have all the pieces to attach the router to the underside of the table. Hopefully this was helpful. I also, like others did, built a very simple and sturdy bench for it to get it off the ground and make it more accessible. Both the Ryobi plunge router and the Bosche palm router I have mounted up just fine. So far, I'm very happy with the purchase.
D**B
Clam level
Nice product but the instructions are crap
O**S
Metal fence.
This is a really nice table and a great value. I was expecting a plastic fence and was surprised to see it was metal. Well packaged, easy to assemble and all parts included. Yes the directions are useless for assembly. But if you search YouTube these is an assembly video. I scored the underside of the table where the router is attached so that I could install the router as dead center as possible. It actually is pretty accurate relative to the ruler for the fence. I included a photo. I will probably never use the included feather boards or miter gauge. But nice that they included them. The router that I installed is a Bauer trim router that fit no issue. It also has centering guides on the base that made it easy to install with the score lines I scribed.
S**P
NOT a Craftsman, NO assembly instructions
I am my city's premier handyma'am. I build and fix things for a living, and do it quite well. The assembly instructions are the worst I've ever seen. They reference a exploded view that is not present. The photos are black and white -- or, for all intents and purposes, black. There is no distinguishing what part or hardware goes where. Plus, they call this a "Craftsman Tool," capitalized to appear a proper noun, which is downright fraudulent. Piece of junk.
E**K
Pretty sketch but... well... it does work
Typical Chinese junk but it did do it's job for ~$100usd As I put this together the first time.... And then the second time... And then the final time... due to instructions being unusable, it finally was together. The legs go on the inside of the table AND the side extensions go on the outside BEFORE you screw in the legs. I also have a Makita router that's maybe 30 years old. It did not fit the pre-drilled holes. I had to use the supplied adapter and that actually worked fine. It held the router well. I used this to carve tongue and groove into oak flooring. it worked fine. The fence goes over the top of the router bit so if you have to extend the bit up high, it will hit the top of the fence. Since it's metal, you can't cut it easily. As I used the table, the safety features had to be slowly removed to make this thing work as needed. The safety clear plastic above the router had to be taped back because it just dropped all the time and caused irritation. The orange kick back feather things were junk. The red ring around the router bit wasn't milled correctly and the wood kept catching on it. Pros: did it's job on/off switch is nice sturdy Cons: safety features were not good so I removed them Instructions are horrible. you will try but will fail dedicate 1 hour to put this thing together fence doesn't allow the router bit to extend up far enough to cut tongue and groove For ~$100 and to use it for 1 job, it worked. Now it will sit in my garage for the rest of my life... Spend $50 more and get the Makita one (which I haven't tried but looks better)
L**L
Solid router table with modifications
First I want to commend this company for their excellent customer service. I contacted them because my router did not fit the table and I wanted to know if I could buy one from them (not possible but that's fine). They went above and beyond to make sure I was happy with my purchase. I'd give five stars for the service alone. This is an inexpensive router table and should be expected to need some modifications. If your router is larger than 6 inches where it attaches to the table it won't fit. I drilled and countersunk extra holes to hold a trim router, then used the included clamps to strengthen it even further. The next day I purchased a router that would fit. Now I have the option of attaching either one as needed. Very solid setup. I had to clean off some production oil and patch a few places where the paint job wasn't perfect. I also had to clean up the rough edges on the table so that it wouldn't scratch my work. No big deal. Just hit it with some cleaner and sand paper. A few hours of assembly and modifications and I have a surprisingly sturdy router table. I plan to mount it into an enclosed cabinet and perhaps even build larger extensions for bigger projects. I have a woodworking business and am happier with this table than I would have been with the big name, expensive options. I've seen reviews that complain about the assembly instructions. I didn't think that they were a problem at all. Sure there are a few words that are off, but it's easy to tell what they mean. The pictures could be much clearer but it really isn't a big deal. This table is so simple and intuitive to put together that instructions aren't really even necessary. This is a router table after all, and if you're planning to use this type of equipment you should have the basic mechanical skills necessary to put the table together. I'm not trying to be a jerk by saying this. All power tools can be dangerous and anyone who has difficulty with this assembly really should consider whether or not they need to work on some basics before tackling a machine that can cause injury if not used properly. I don't normally write long reviews, but this one earned it.
Trustpilot
3 weeks ago
2 weeks ago