
Desert Online General Trading LLC
Dubai, United Arab Emirates
Desert Online General Trading LLC
Dubai, United Arab Emirates


💼 Elevate your data game with dual-drive speed and secure cloning!
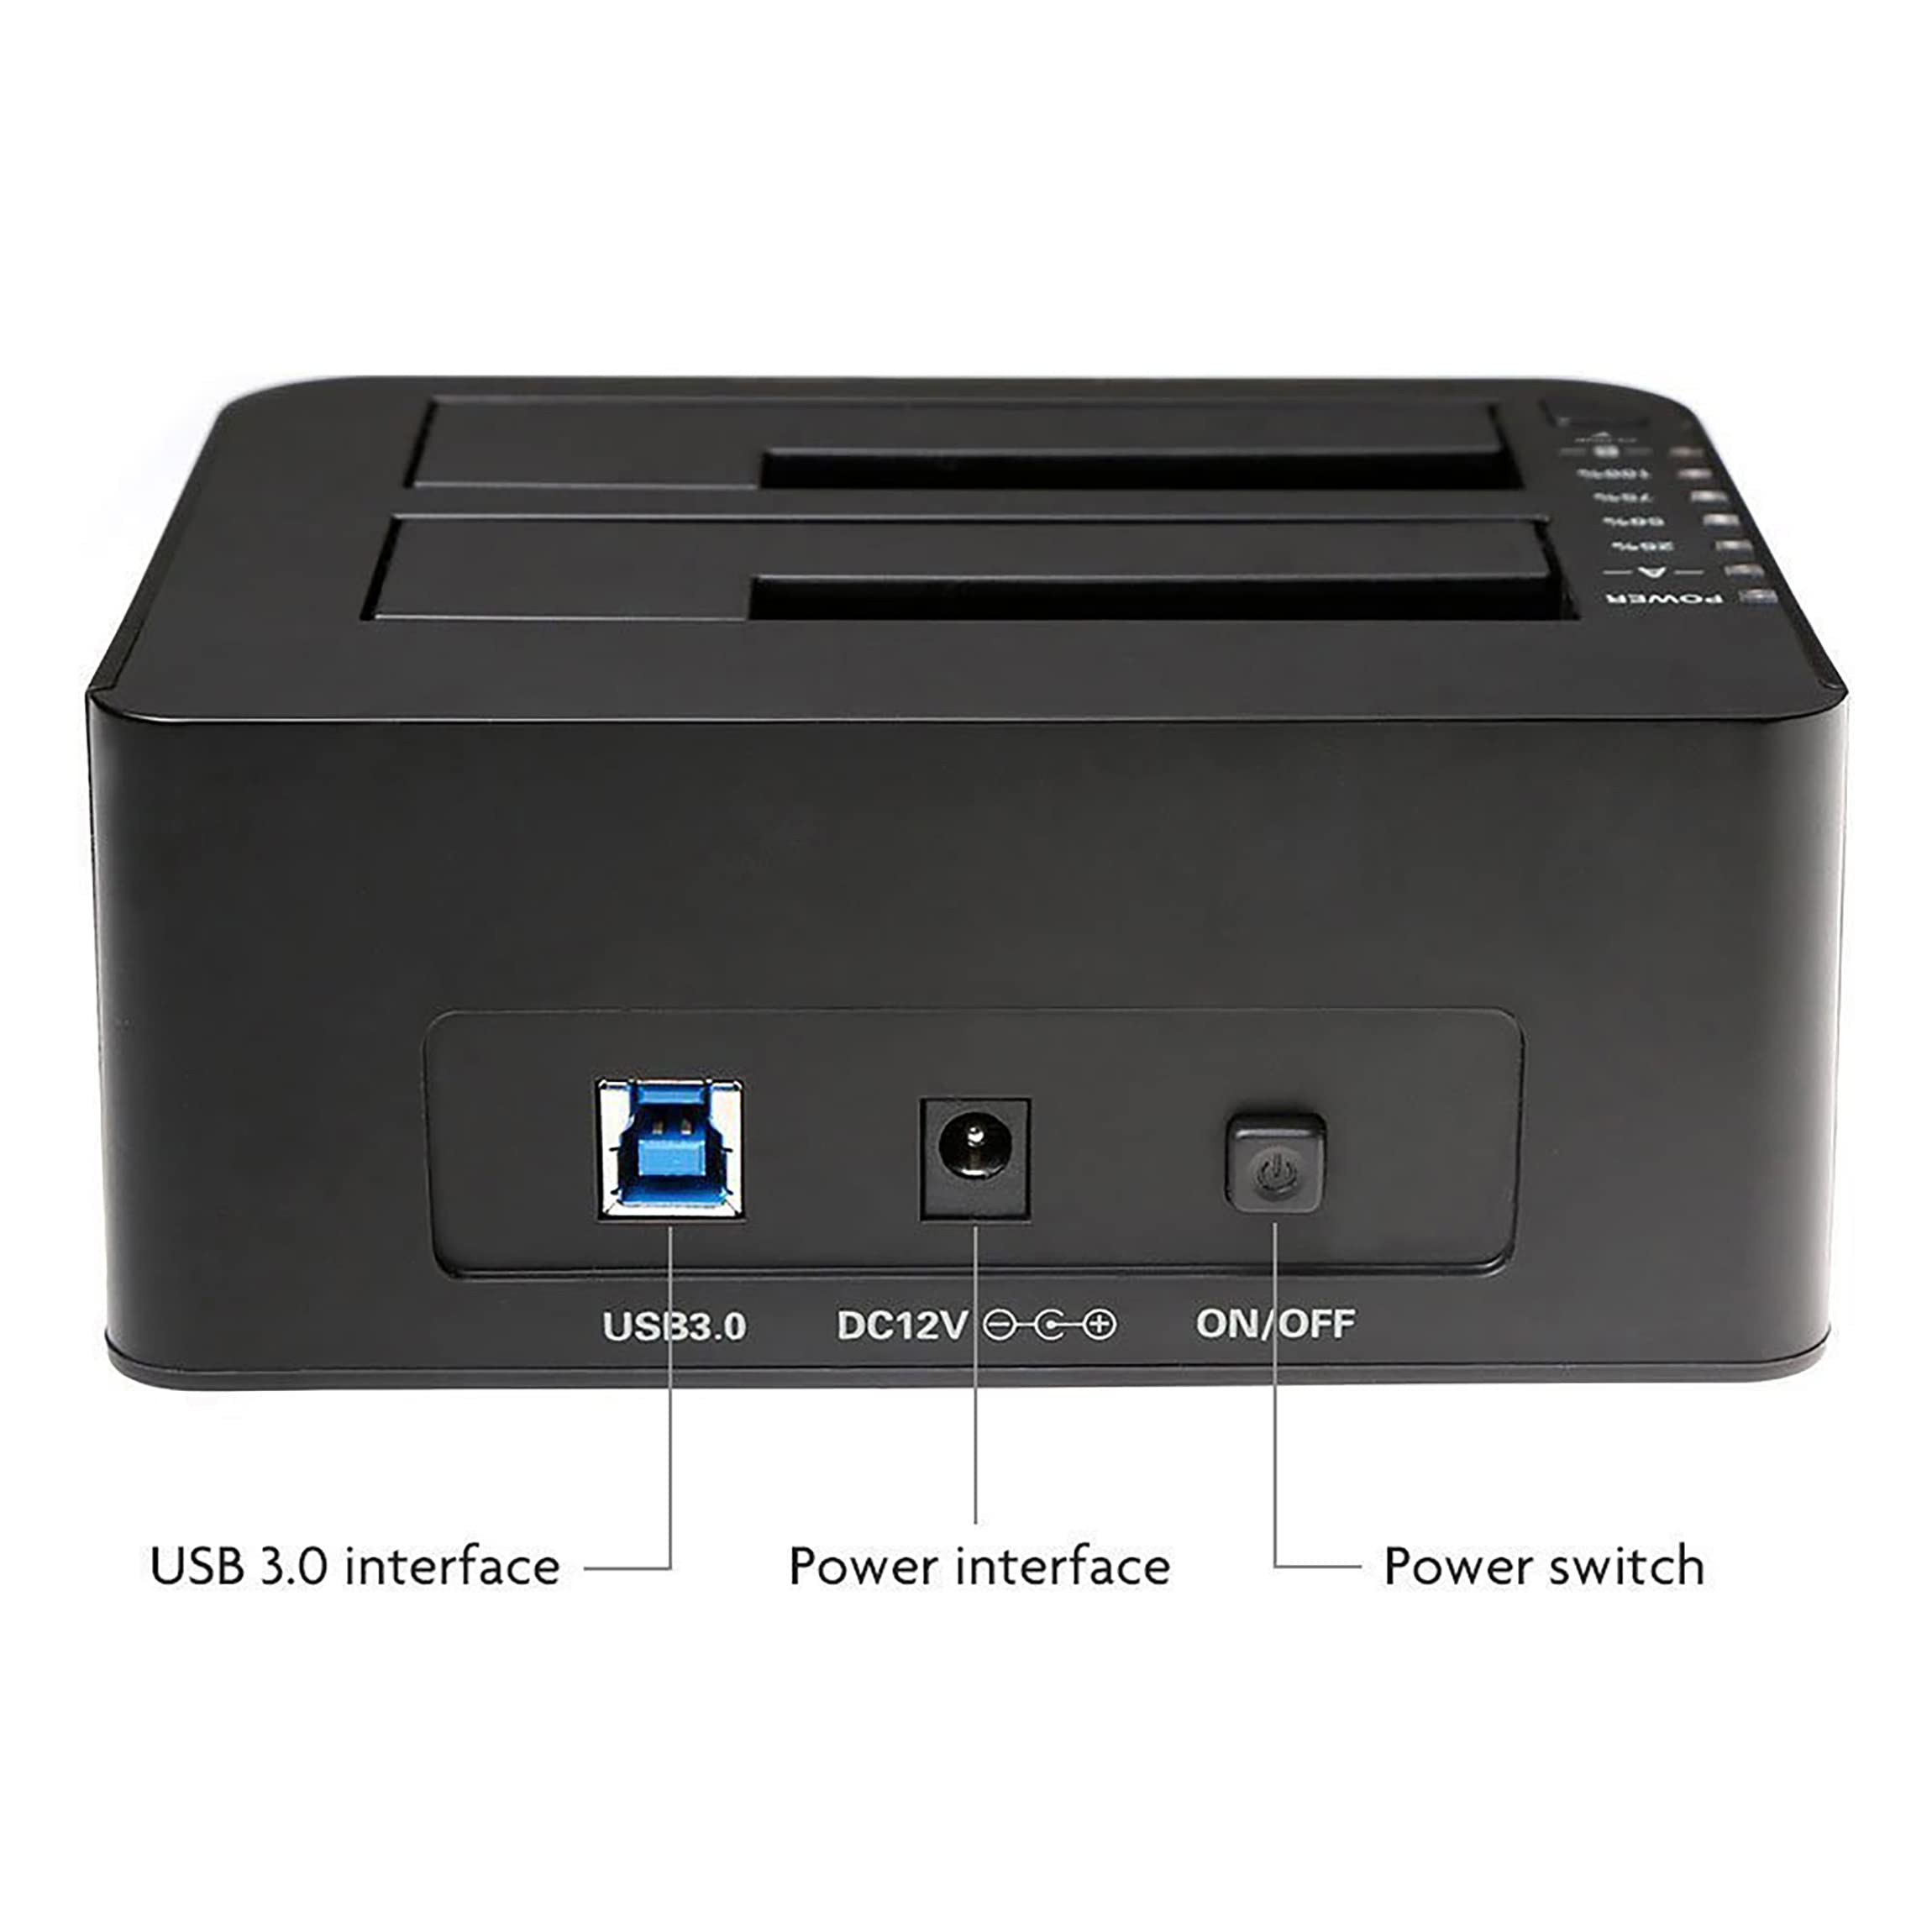
The WEme USB 3.0 to SATA Dual-Bay Docking Station supports two 2.5" or 3.5" SATA HDDs/SSDs up to 8TB each, delivering ultra-fast 6Gbps transfers with UASP. Featuring offline cloning without drivers, integrated safety protections, and an efficient 12V/3A power supply with auto sleep mode, it’s a reliable, plug-and-play solution for professionals managing large data sets across Windows, Mac, and Linux.
| Memory Storage Capacity | 8 TB |
| Compatible Devices | Projector, Laptop, Netbook, Tablet, Hard Drive |
| Max Number of Supported Devices | 2 |
| Data Transfer Rate | 6 Gigabits Per Second |
| Manufacturer | WEme |
| UPC | 700598715583 |
| Hard Drive | 6 TB |
| Series | FBA_WEMEMST-006 |
| Item model number | FBA_WEMEMST-006 |
| Operating System | Windows 7 or higer / Mac OS / Linux |
| Item Weight | 1.26 pounds |
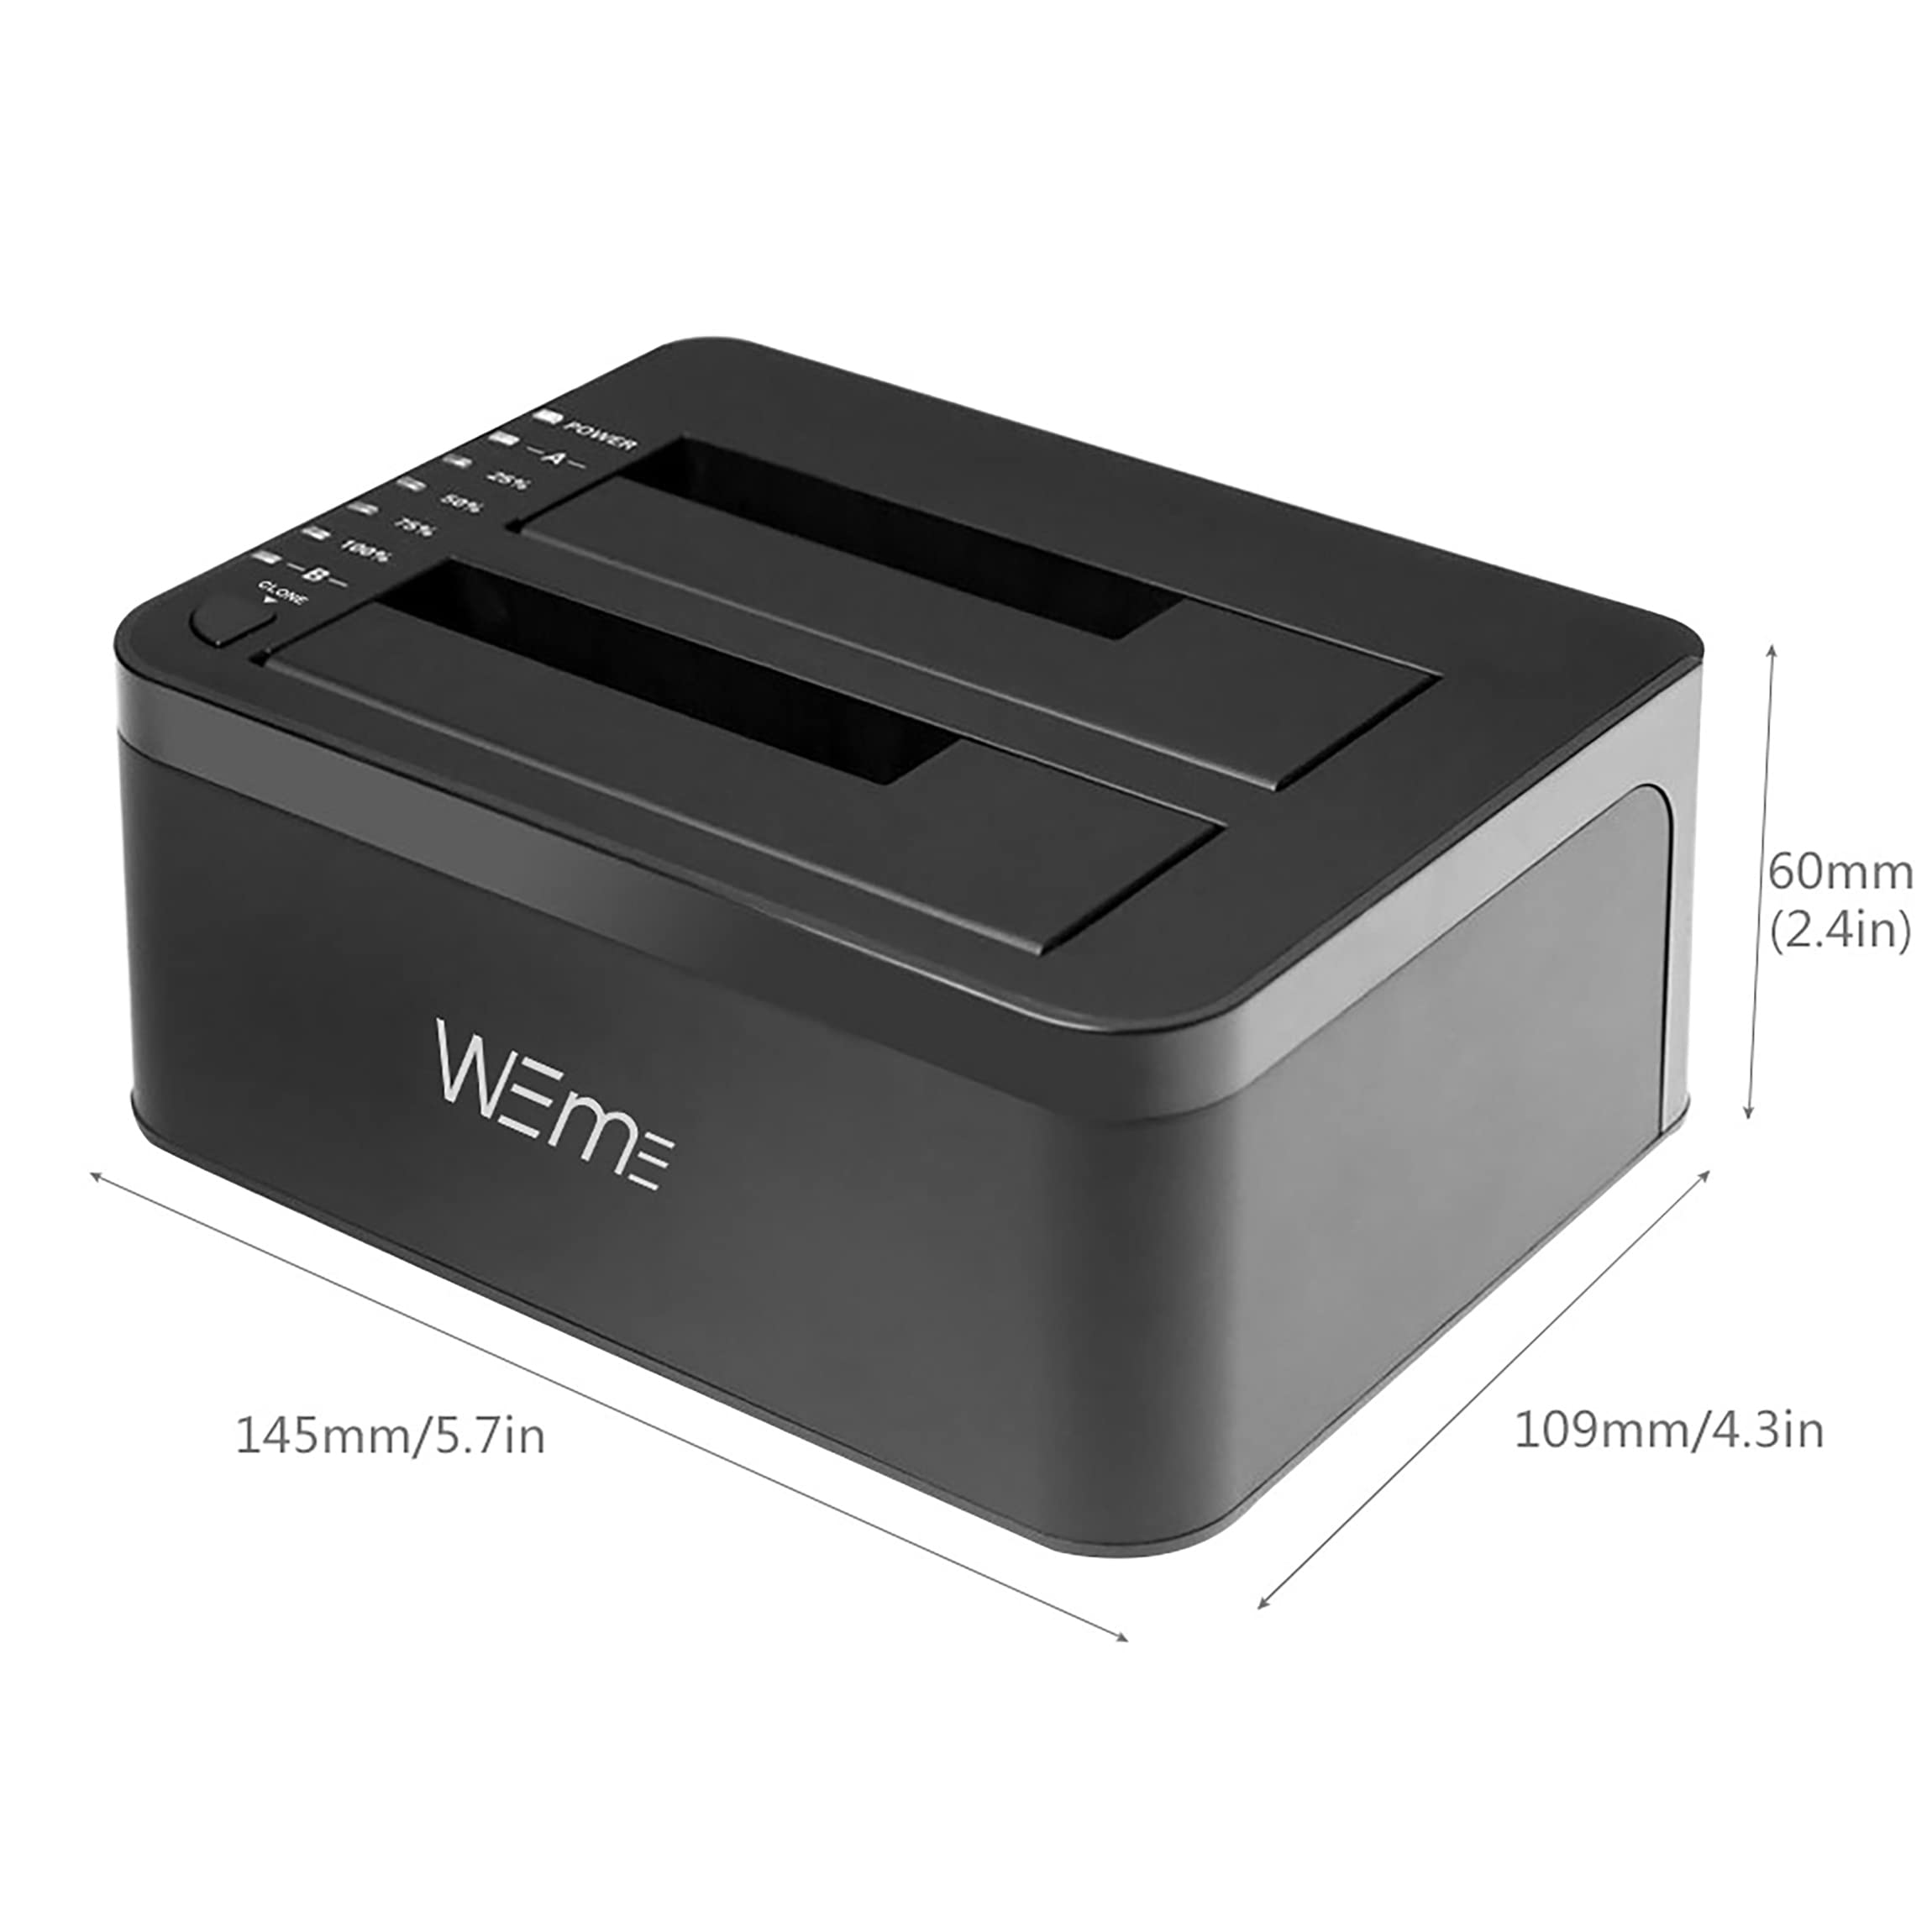
| Product Dimensions | 5.71 x 4.29 x 2.36 inches |
| Item Dimensions LxWxH | 5.71 x 4.29 x 2.36 inches |
| Number of Processors | 2 |
| ASIN | B00PTUQE4M |
| Is Discontinued By Manufacturer | No |
| Date First Available | November 19, 2014 |
A**S
Used Once, Worked Great, Will Update, Including Guide to Hardware Cloning
So far, I have only used this product once and that was to perform an offline clone with no connection to the PC. Everything went perfectly.Below I will provide a step by step guide of what I did if anyone is looking for a comprehensive resource. I am not responsible for anything you might do with this knowledge. Be aware I am only talking about using machines with like machines (Mac and Mac or windows and windows) and drives that are already in the same format. You can look elsewhere for a guide on that by googling “How to format hard drive Mac/Windows” and these articles will often include information about what the different formats mean for your practical use and in what situations you should choose which.1) Gathered my hard drives. For this I was cloning my 256 GB SSD that hosts my important programs and Operating System onto a brand new 1 TB SSD.2) Put both drives into the dock. Power should be turned “OFF” when inserting and removing drives or you run the risk of corrupting and losing your data.Remember when cloning that the original has to go into slot A and the new target drive needs to go in slot B. The arrows will help indicate the flow of the transfer of data. The new drive must be bigger. You might be able to get away with the same size but you can be risking it as not all drives, even in the same class, are created equal.3) Turn Power “ON.” Power button should be pushed in. The power indicator LED will glow a solid green and the LEDs next to each drive should glow yellow.4) Hold the “clone” button for approximately 3 seconds. The blue led indicator by “100%” should begin to glow. Press the clone button again. If you waited too long and the blue light disappeared, nothing will happen, everything will look the same as it did before pressing the clone button. In this case, again hold the clone button briefly, and when you see the blue LED light up, press the button immediately.At this point the blue LED indicator next to “25%” will flash rapidly to indicate progress. It will glow solid when it has completed each of the milestones “25%” “50%” “75%” and begin rapidly flashing the following milestone’s LED. Cloning is complete when all lights have been solid for two minutes or turned themselves off.5) Turn the dock’s power off. The new drive is ready to be installed wherever you meant for it to go.6) If like me, you copied an internal drive (though this should work for external drives as well) that was smaller to a bigger one you will still need to complete some steps on the software side of things.7A) On Windows, right click on the windows icon in the bottom left and click on disk management. Here, you will see whatever drives you have connected to your computer. Be careful to select the right one if you have multiples as you risk of deleting, formatting, damaging, corrupting, etc any other drive if trying to work with them, though windows often will have pop ups to warn you away from doing anything too stupid.The cloned drive will have an amount of unallocated space equal to difference between the original and target drive (in my case about 750 GBs between a 250 GB and 1TB drive). Right click on the space that is currently available for use and select expand. Windows will pop up explaining about what’s happening, and that it can only use simple volumes or unallocated space for the expansion. If you accept and everything went correctly, you should find the drive back at its original size and all your cloned files in the same space and place. This meant my operating system was just fine, all my setting were exactly as they were before the clone, my programs were still present and useable, and I have way more space available on the drive.7B) On MAC use the pre-installed application “disk utility” to examine your drive. Similarly to windows, select the correct drive and expand it.
J**E
Worked with my 16 TB hard drive!
I had an old computer with very slow SATA cords. This enabled me to transfer information between drives that much quicker. Now that I have a faster computer it's still convenient such as when I have to upgrade my SSDS. I'm able to shuffle through all my various size needs all the way down until I end up coughing out the lowest capacity drive.
D**L
Great external dock, works perfect in Win 7
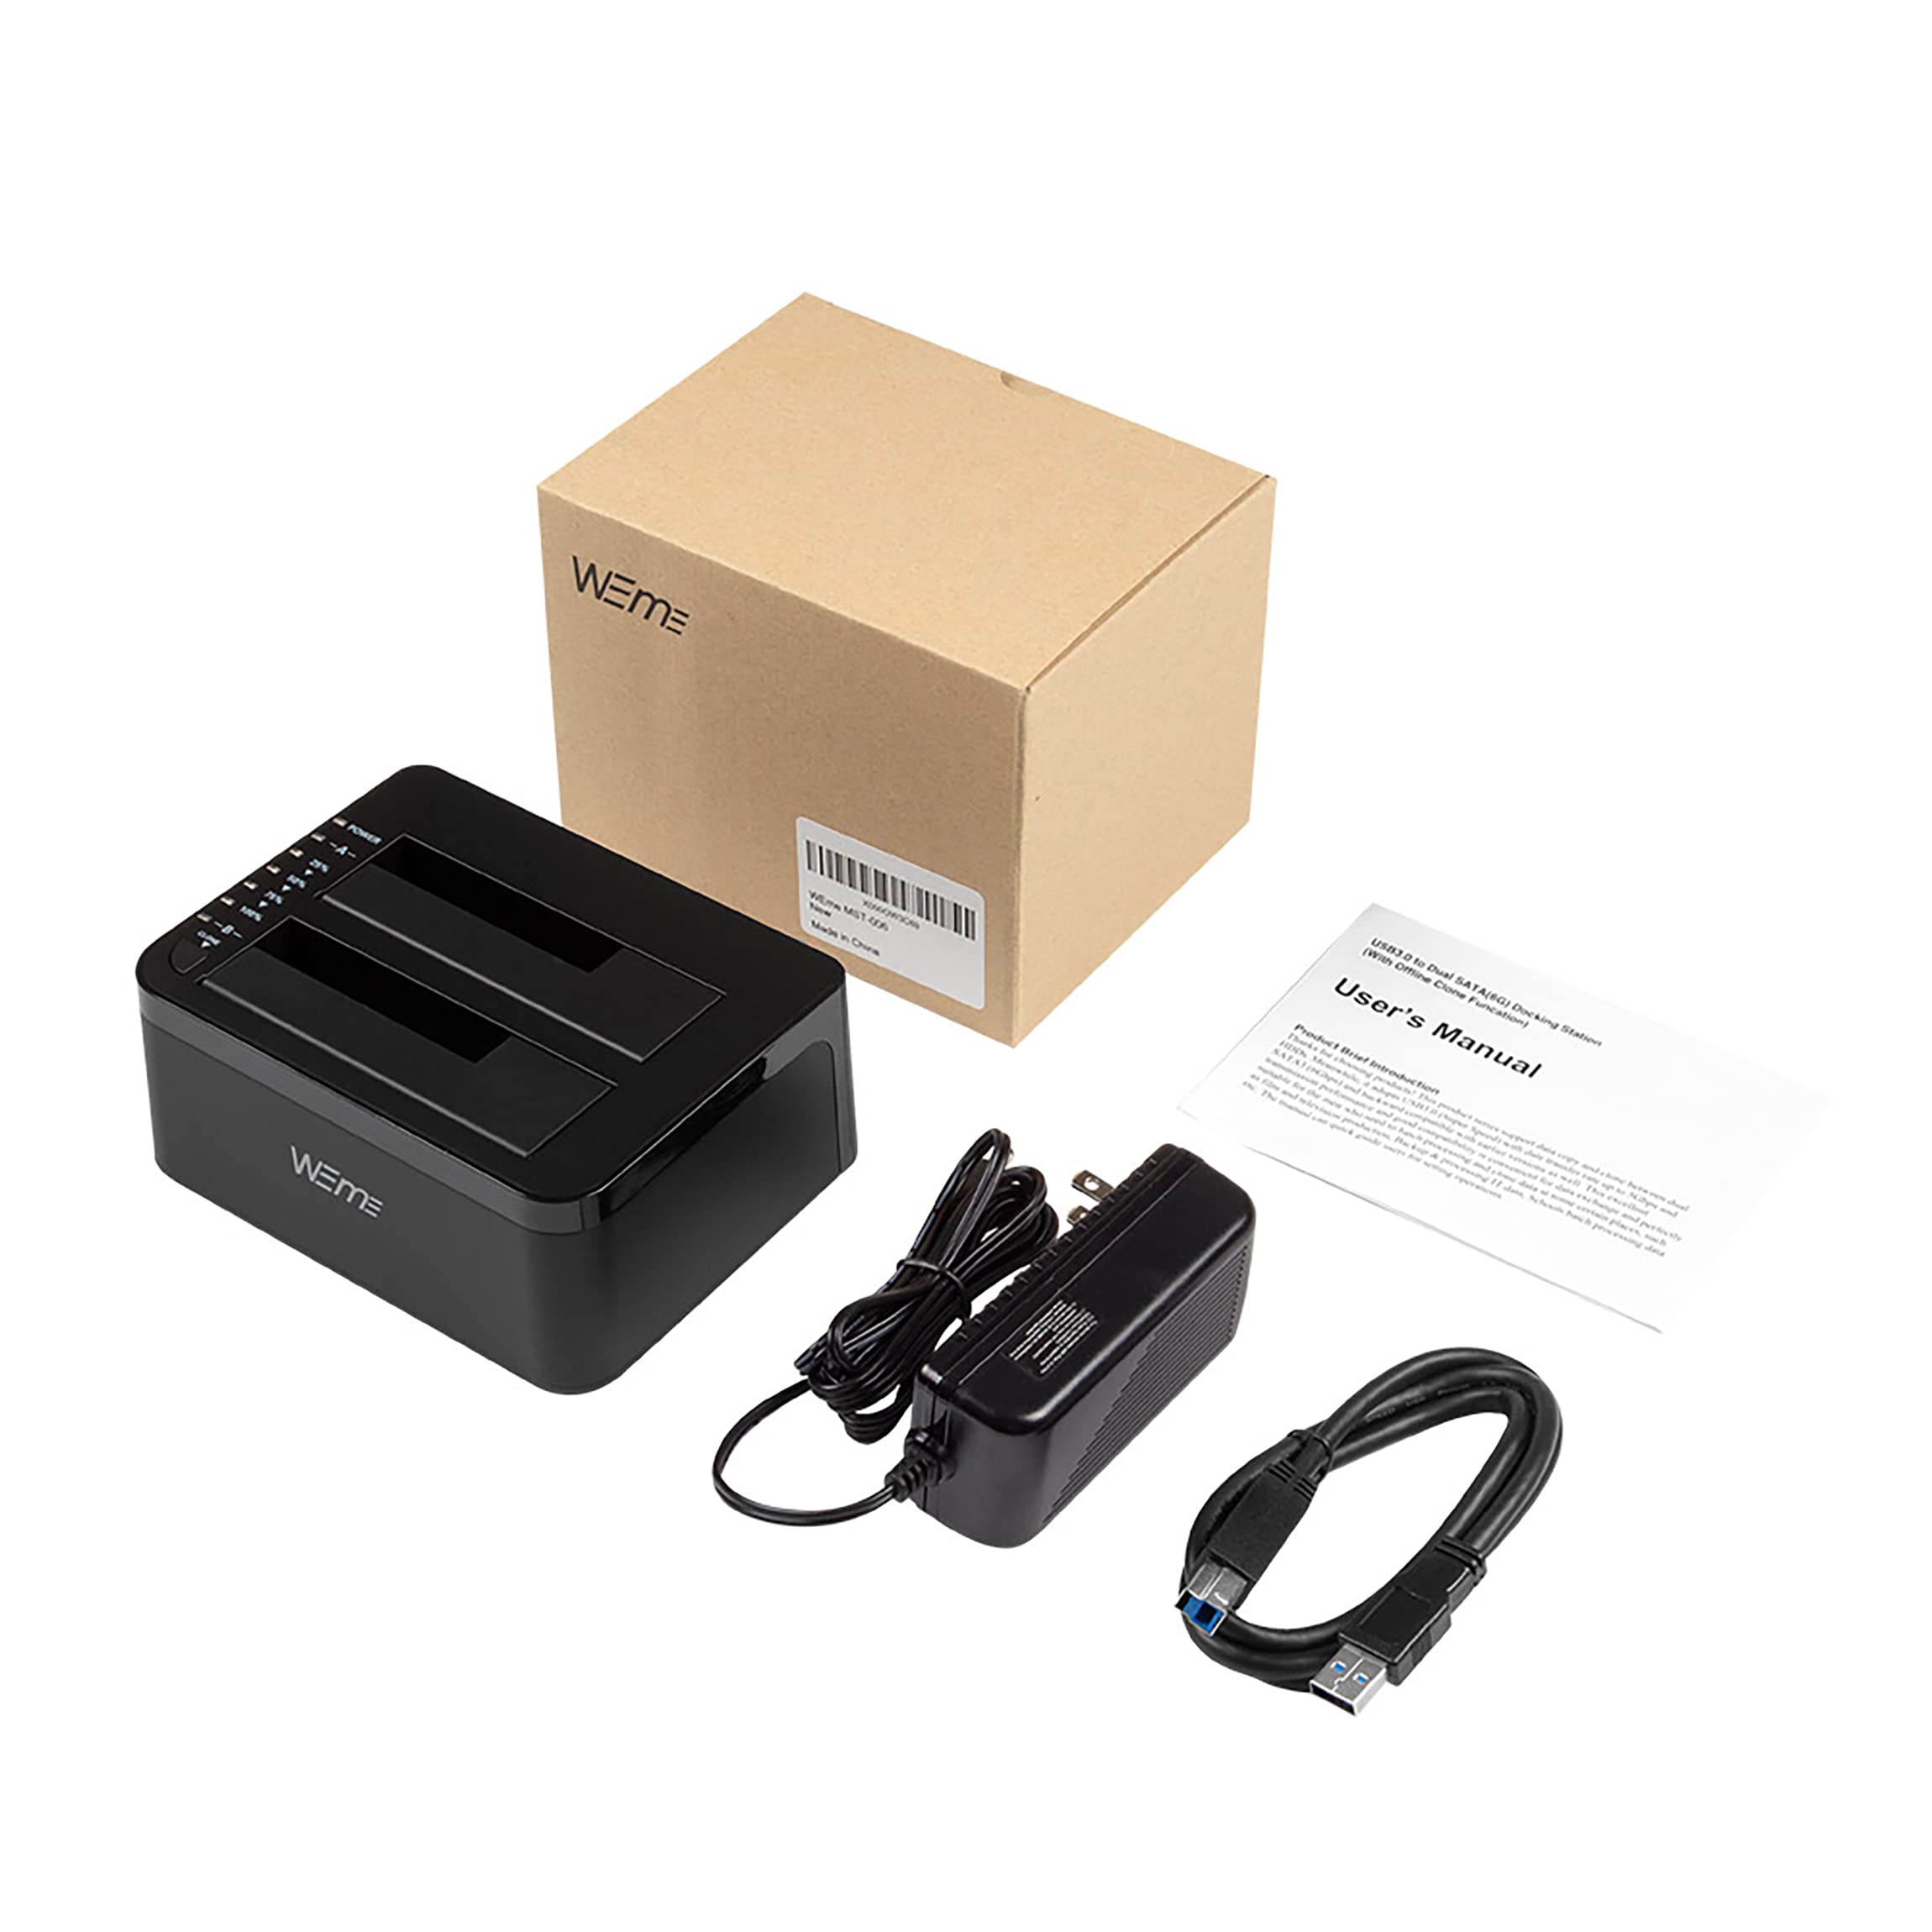
[ UPDATE ]: Beware that the onboard cloning functionality doesn't simply copy files; it literally clones from one drive to another. If you're familiar with Clonezilla, this is the same functionality, only with a lot less steps to go through. Hold down the clone button until the 100% light comes on, then tap the clone button again, then sit back and wait for the process to finish.This will be faster than Clonezilla as well, since there's no intermediary operating system requiring attention while the process runs. [ /UPDATE ]This little unit is great! Dropping in a new drive makes it drop off the USB net, then come back up when the drive is spun up and ready to go. If this behavior is by design, it's definitely a plus because the Nexstar dock I have often needs to be powered down after switching drives before it'll show up in Explorer.This dock also does the same when adding a second drive, and it ensures both will be shortly accessible without resetting and also prevents surges on the USB port while older drives are sucking down power to spin up!I haven't run any additional software to make it work under Windows 7, so I can't speak for drive duplicating process beyond dragging and dropping files between them, which is easier and works perfectly.Also, while it does initially seem like simply a bit of packaging, the clear shell that fits over the dock is a simple and useful dust cover (and in fact has a label indicating just that. The only suggestion I'd make on this part is for the manufacturer to pre punch slots in the cover so that it can be slid down flat over the dock while it's still plugged in, since I and many others prefer to leave it connected even when not in use.Speaking of which, the unit will also put itself and any drives plugged in to sleep after a period of idle time. This is indicated by the power light blinking slowly and is a welcome feature, since I often use external drives for ready archive storage. Accessing the drive in Explorer wakes it up and makes it usable in seconds.All in all, this is a very useful little dock, and works every bit as reliably as I'd expect such a simple thing to do.
Trustpilot
1 month ago
1 month ago