


🖤 Seal your space in sleek blackout luxury—privacy and comfort, perfected.
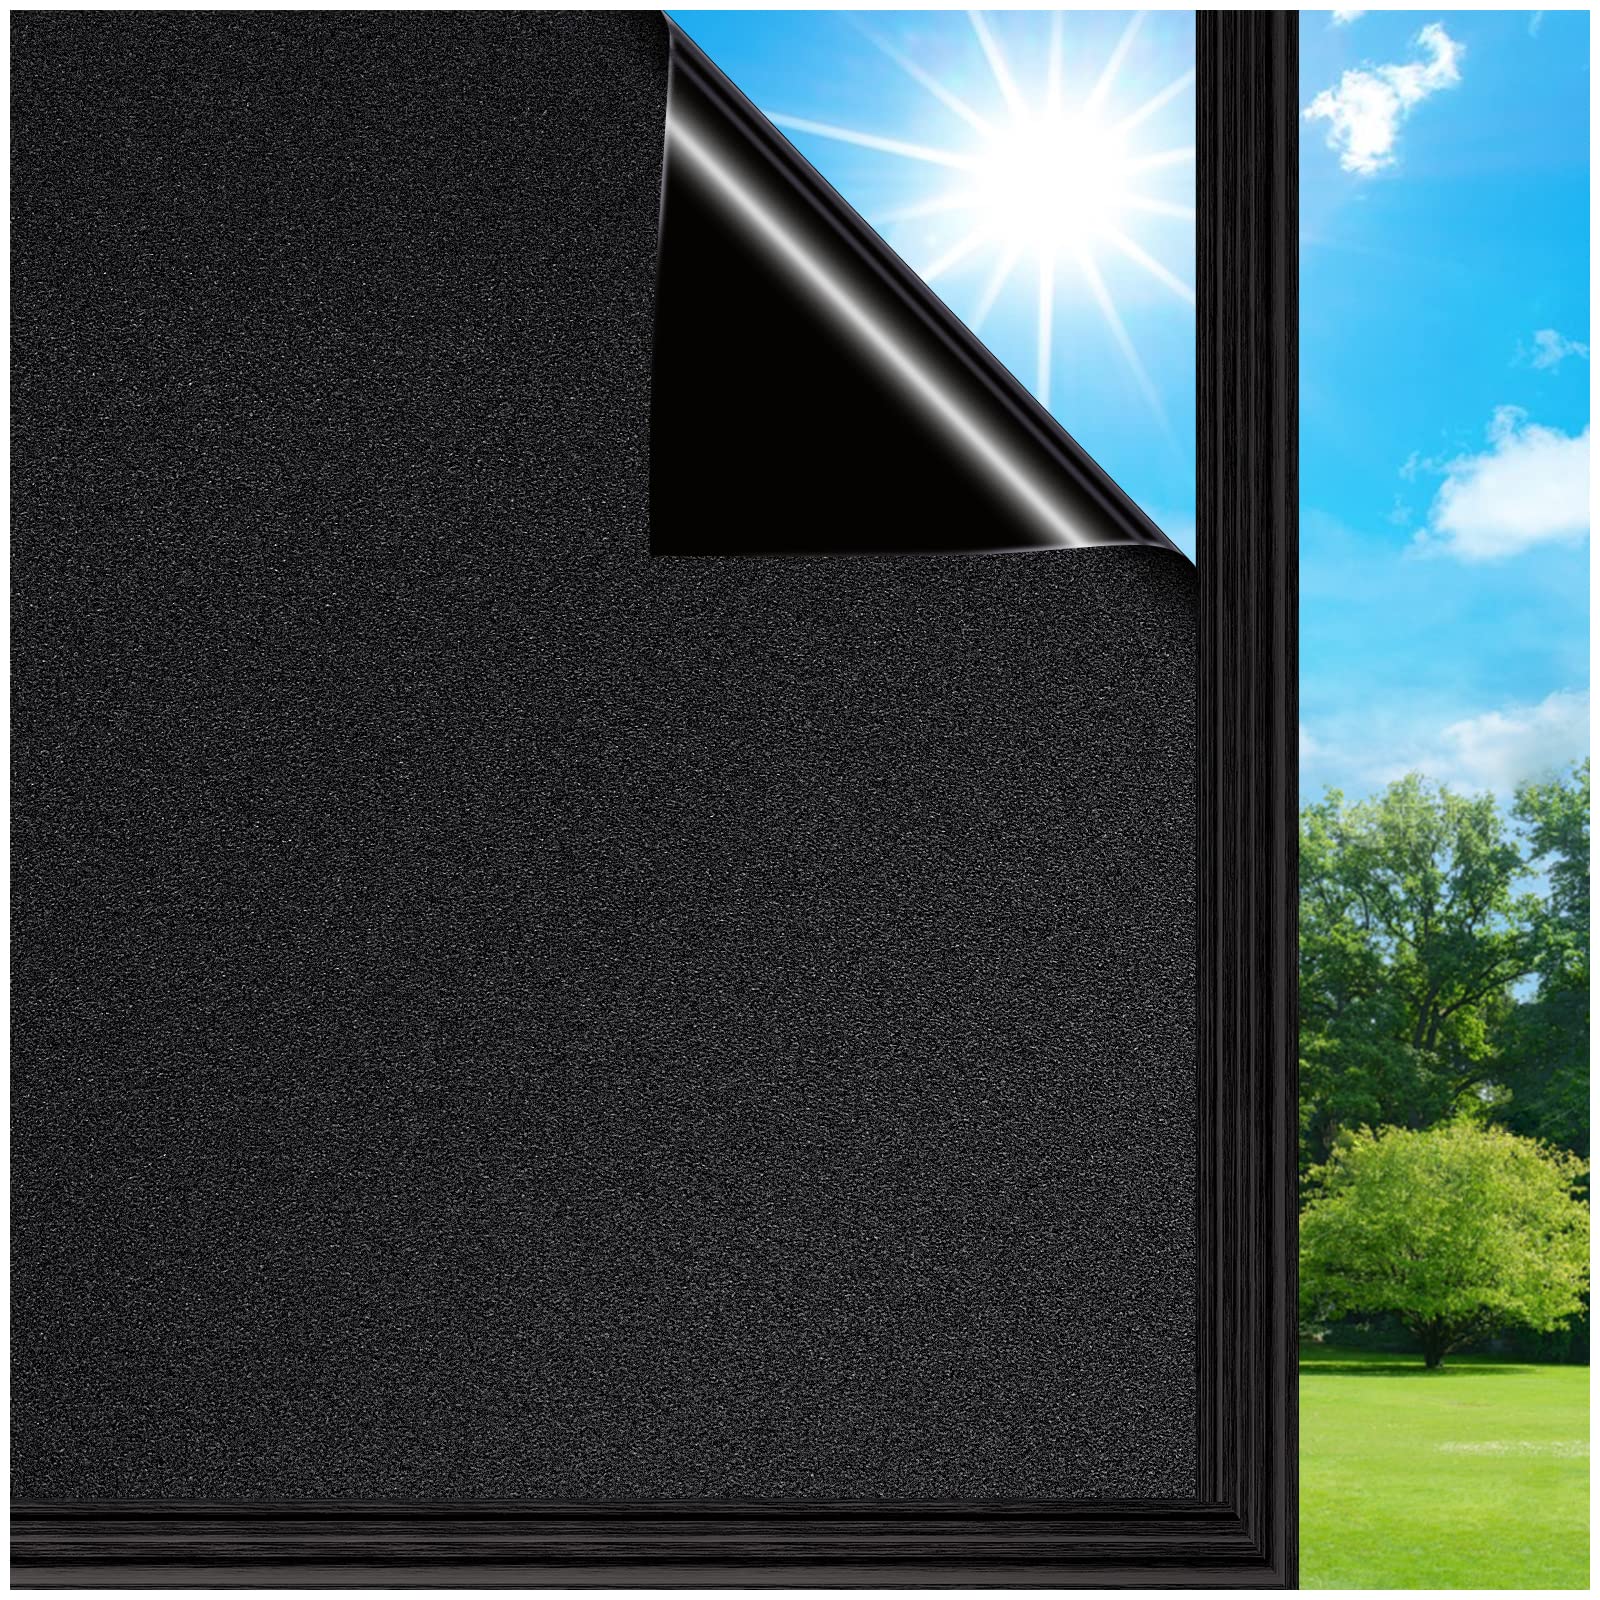
Coavas Blackout Window Film offers 100% sunlight and UV blocking with a reusable, glue-free design that ensures easy installation and removal. Ideal for enhancing privacy, controlling indoor temperature year-round, and creating a perfect dark environment for daytime sleepers or light-sensitive users.
S**X
This stuff is great!
I love this stuff and have used it on several windows over the years. It is a great inexpensive way to easily change up windows. This time I got the frosted version to help provide some privacy in a bathroom and on some garage windows.Product came in perfect condition and have seen other similar products where the the tubes are bent while shipping.As I mentioned I have put this type of film and several windows of the years and the frosted film works great for privacy. Plenty of light still comes through in the daytime. I tested it at night with all the lights on in the room. While standing outside looking in and one can only see rough heavily blurred shapes through the frosted film. So it works as expected and feel completely comfortable leaving the blinds open while taking a shower with this film on the window.I have had this film on other windows for over seven years and have yet to notice any discoloration, yellowing, or fading.Hanging is relatively easy but will provide some tips on what I have found as the best way to do it. First, two people are better than one. (Have hung this film on by myself before and it just takes longer and more of a hassle.)Second clean the side of the window where you are applying the film thorougly. I use Windex and then a wet towel to remove any remaining window cleaning chemicals in case they might react with the film and finally paper towels to dry it off. (I have only put the film on the inside of my windows and have not had an issue. Have no idea what happens if this film is placed on the outside of a window exposed to the elements.)Next and why two people make it easier than one is it is best to have one person hold the film up against the window and a second person cut a rough outline. As others have mentioned when cutting the film for the first time leave about an inch over and past the edge of the window pane and plan to trim it off later. (Never try to pre-measure and cut the film to fit the glass. I did my first two windows this way and each time miscut the film as windows can be slightly irregular or the line I cut was not straight and then you end up with gaping gaps along the edge of the film. It is always easier to cut away the excess with the film on the window.)After you have a rough cut outline add the soapy water and coat the glass completely. Any dry parts on the window are much harder to work with so soak the glass until until water is running down the pane. Also excess water will not damage the film in any way so you can’t hurt it with too much water.Then remove the backing and place the side where the backing had been up against the window. (Be careful that portions of the window, particularly at the top, don’t dry out while you are trying to get the backing off the film which can tricky. If they do just add more water to the window.) If the window is wet you can then move he film around slightly to get it in the right place.This next part is the hardest. Take a really sharp box cutter or exacto blade and cut along the edges of the window to remove the excess film. This takes some practice as the film can bunch up a bit as you pull the blade through it and make the cut irregular - a fresh sharp razor blade helps to prevent this. Also cut the film on the frame and not the glass. If the film is larger than the window glass and hanging over the edge onto the frame, the film tends to lift away from the glass at the edge and cutting directly onto the glass ends up with the film being about 1/8 inch too short and not flush up against the edge of the frame. Again this takes some practice and don’t expect your first window not to have some gaps between the film and the edge of the glass and the frame.Once the film is cut to the shape of the glass, then use a squeegee to push the bubbles and excess water to the edges. Be careful not to put too much pressure on the sharp corners of the squeegee as it can gouge the film.With two people, we did (10) rectangular 23 in x 66 in window panes in about two hours. I imagine if I had done it by myself it would have taken three or more hours.Again I love this product for frosted privacy glass. The finished product looks like regular frosted glass. Have not tried the more decorative films yet but will in the future.
N**E
Excellent Privacy Solution - Easy to Apply and Effective
Remember to *Measure twice, cut once*I’m thrilled with this frosted window privacy film! It was incredibly easy for one person to apply using just a spray bottle of water. The film clings smoothly to the glass, and I had no issues with bubbles or wrinkles.The level of privacy it provides is perfect—light still comes through, but it completely obscures the view from outside. It's also easy to remove and reposition if needed, without leaving any residue behind.Overall, this product exceeded my expectations. It's an affordable, hassle-free way to enhance privacy while maintaining a bright, airy space. Highly recommend!
R**S
An afternoon project, but not easy to install. And doesn't hold that strongly.
Great light diffusing film. The room still gets lots of light, but its not at all see through. I was able to use one 17.5 X 78.7 inch roll to do all the windows in my garage door, though I had to be very careful as I had to quarter the film to have enough, and only had just enough. It's an easy project to fit in an afternoon, but that's not to say it's an easy project to get right. I wasn't able to cut straight lines with scissors, though the scissors cut through it easily. I did a little better folding and creasing it, and then going over it with my box cutter on a gridded cutting mat, but that was far from perfect too. I couldn't start with my bladed arm paper cutter because it was too wide, but once I cut it in half lengthwise I was able to straighten the smaller edges with the paper cutter. I didn't have any trouble cutting through the film with any of these methods, just trouble getting straight edges. It didn't arrive with instructions either, so I googled that. I cleaned the windows, and used a spray bottle with soapy water to cover the glass before putting up the film, and then used a shower squeegee to squeeze out all the bubbles completely. That sort of worked, but was peeling and rolling away at the edges and falling off after a few hours. Then I discovered from the seller's posting that the film has a protective backing that you need to peel off before attaching. For the life of me, I could not peel the backing off by hand. It was so well attached that it was like it wasn't even there. But I was able to get it off by using really sticky tape (like electrical tape) on both sides of a corner and then pulling them apart, or failing that, at least having the tape hold one side while I pulled the backing off by hand. With the protective backing off, it's much more prone to creasing, so you have to be careful. But when I did everything right, it looked great. However after a day, one of my four windows still ended up peeling. I had to use glue on the corner to at least get it to stay on. But since it's not holding well, it's also now capturing particles between the film and the glass and will probably get worse over time. This stuff just doesn't hold on as strongly as some window decals.
Trustpilot
1 day ago
2 weeks ago


