🛠️ Fix threads like a pro—because your engine deserves precision!
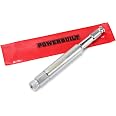
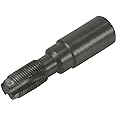
The Powerbuilt 14mm Back Tap Spark Plug Thread Repair Tool is a patented, collapsible device designed to restore damaged spark plug threads efficiently. Made from heat-treated 4118 steel and meeting ANSI standards, it repairs fouled threads without removing cylinder heads, saving time and preventing debris from entering the engine. Compact and durable, it’s an essential tool for motorcycle and automotive professionals seeking reliable thread repair.


| Manufacturer | Powerbuilt |
| Brand | Powerbuilt |
| Model | Back-Tap Thread Repair To |
| Item Weight | 5.6 ounces |
| Product Dimensions | 4.79 x 9 x 1 inches |
| Item model number | 640811 |
| Is Discontinued By Manufacturer | No |
| Manufacturer Part Number | 640811 |
Trustpilot
1 day ago
2 days ago