🌟 Transform Your Tresses with Nature's Touch!
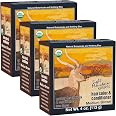
Light Mountain Henna Hair Color & Conditioner is a chemical-free, semi-permanent hair dye that offers vibrant color for 4-6 weeks. This organic henna leaf powder is suitable for both men and women, ensuring a smooth application and stunning results without harmful additives.


P**5
Definitive Guide to Using Henna - with Pro Tips!
I am not a professional stylist or one of those people who is paid to review a product. I am simply someone who has used Light Mountain Henna (in various colors) for a few years, and noticed that there were a lot of discrepancies in the reviews as to how to properly use it. So, I thought I'd write up a little guide on my experiences (using light mountain to dye my hair both red and brunette) to make the whole experience a little more approachable for people who want to give it a try.The TL;DR version - dyeing your hair with henna is simple, cost-effective (my hair stayed red where I dyed it for over a YEAR - a vibrant red!), natural, conditioning, and messy. It's a bit of a time commitment, but it doesn't take THAT much longer than getting a professional dye at a salon, and the result actually look natural! When in doubt, give it a try! You can even throw a henna party!What is this powder in here? Each of these kits comes with a 4 oz bag of powder (which is enough for medium thickness shoulder length hair) that is made up of some combination of henna (for red tones), indigo (for blue tones), and cassia (for brown tones). The combination of these powdered leaves will give you a close approximation of the color you desire if you follow these instructions. In general though, the dyes of the henna leaf take longer to cure, so cure your mixture for 10-30 min for brown/black colors, and for at least an hour for more red to come through.When it comes to picking your color: if this is your first time using henna, be sure to pick the shade that is one less than the one you want. This is because henna actually oxidizes and turns a shade or two darker within the 72 hours after dyeing it. I just recently tried to dye my hair from light brown (see package for natural hair colors, and light brown is my natural color) to medium brown, and didn't think it was dark enough when I first washed it out of my hair. The next day, it was the perfect shade - a nice brown that is similar to a Hershey's dark chocolate candy bar.Differences for red hair and brown hair:For red hair, I microwave about a cup of lemon juice (to help your hair absorb the red color, apple cider vinegar also works) until hot and stir it into the powder in a glass bowl with a wooden or silicone spatula. Then, slowly add hot distilled water until your mix reaches a 'yogurt' consistency. Then, cover your mix with plastic wrap and wait at least an hour.For brown hair, I actually brewed some french press coffee (the metal in the coffee press didn't seem to affect my final color), and just mixed that in to yogurt consistency. Then, only let it cure for 10-30 min. To help it cool a little faster, I put it in the fridge for like 20 min and it came out warm and with the indigo ready to go!Instructions are the same for both colors from here out!During this 'curing' time, it's a good idea to clear out your bathroom counter (or wherever you're going to apply the henna), gather a dark, old shirt to wear, some old towels, paper towels, plastic wrap, hair clips, and latex gloves (or any other protective glove, even kitchen gloves are fine). Also, hop in the shower real quick and wash all of the products out of your hair and DON'T condition. By the time you've done all that your henna will probably be pretty much cured and you can move on!Come back and mix your henna again (the top will be darker with the expressed dye) and verify that it is still the same consistency. If it needs more water, just add some room temp distilled water until it is 'yogurt' again. Then, go into the bathroom (a mirror is helpful unless you have someone else applying this to your hair), clip your hair in three layers (top, middle, and bottom), put on your old clothes and gloves (henna stains your hands and your clothes, so don't do this on carpet!), drape an old towel over your shoulders, and it's time to get to work. Pro tip, it sounds kinda weird, but trust me when I say that it is easier to start at the top and go to the bottom. Here's why: you are basically putting mud in your hair, which makes it heavy, but also allows you to clump it together and it will stay where you put it. By starting at the top, you can massage it through your hair and then glomp (for lack of a better word) it all at the top of your head and it will just stay there. Then, when you do the middle layer, you can glomp that hair on top of your other hair at the top of your head. Repeat for your bottom layer of hair.The hard part is over! Take off your messy gloves and cover your hair with plastic wrap as best you can. Focus on keeping the wrap behind your ears and as tight as possible to prevent drips (which WON'T dye your neck and face, but are ridiculously annoying). Then, when your hair is all wrapped up, take an old towel and wrap it around your head turban-style to help keep heat in. I've never used a blow dryer on my hair while it was dyeing, but I don't see that it would hurt. And now, you wait.How long you wait depends on how much color you want. If you only want a smidge of color, 30 min is fine. If you want super dark colors, leave it on for roughly 4 hours. I don't usually end up having it on my head for much longer than about 2 hours. While your hair is dyeing, lay some towels on the back of your couch and rest your head while you watch a nice movie :D Alternatively, you can take a nap! Take some 'me' time!Rinsing it out: Here is what I do to rinse the henna out AND reduce the lingering smell by about half the time. Get in a bathtub and start the faucet running comfortably warm/hot water with the drain open. Slowly take off the towel and plastic wrap and put your head under the faucet to remove somewhere between 60-80% of the henna. Just keep running your hands through your hair to massage as much as you can out of your hair - you can wear gloves, but I have never had a problem with my hands staining doing it this way.Once you have most of it out of your hair (and some lingering grittiness at your roots), turn on your shower and grab some conditioner. The creamy oils of the conditioner are like magic for getting the rest of the henna out of your hair. Squeeze a generous blob of conditioner into your hand and then massage it into your hair and scalp thoroughly. Then, rinse it out.Pro tip: Here's what I do to help reduce the lingering smell by DAYS: I then shampoo my hair right away! GASP! I know that goes against what they say on the package, but trust me - the first time I dyed my hair, I only conditioned it and didn't wash it until the next day, and the smell (only really detectable when wet) lasted several days in the shower later. The second time, I just wanted to get more grit out, so I shampooed, and my goodness, my hair smelled normal in only a couple of days! And, the best part? My color didn't seem to be affected at all! This time around, I still have a lovely deep chocolate brown after shampooing!Then, finish with another generous dab of conditioner - at this point 99% of the henna will have washed out and your hair should no longer be gritty - also, it is freshly washed so it is ready to be styled right away!Be sure to give your tub and shower a quick rinse on the walls and basin, and then you're done! Wash your towels and old clothes in the same wash, wipe down any lingering mess, and freeze any remaining henna to touch up your roots later! That's it!Total time to dye your hair brown: about 3-3.5 hoursTotal time to dye your hair red: about 4 hoursHopefully you found this guide useful - this is the same routine I follow every time I dye my hair with henna, and the more times you do it, the easier it gets!
J**R
Best hair color/conditioner EVER!
SOLD! Thank you everyone for leaving reviews, cause I would have been to nervous to buy this otherwise, which is why I want to share my experience as well. My hair turned out GORGEOUS, and soft, and the color is so pretty, and my curls are perfect and not frizzy.First off, I have naturally curly, fairly thick mid-back length hair. My hair was recently ruined at a cheap hair salon with an awful chemical dye. I wasn't even lightening my hair, I was trying to go darker, and left the end light for an ombre effect. I do not know what I was thinking, and am now very skeptical of yelp reviews. Anyhow, I tried so many deep conditioning treatments, and my hair just wouldn't "heal" it was fried and felt like hay. I used coconut oil, and several expensive deep conditoning treatments to no avail.On to Light Mountain (Medium Brown) experience:My steps:- I used a large glass bowl and wooden spoon (expect your spoon to get stained).- One package of the powder.- 1 egg- Coffee instead of water- Nutmeg, cinnamon & ginger spices for scent and added color.1. I combined all ingredients very well until it was like a nice thick yogurt consistency. I covered in plastic wrap and let "cure" for an hour.(Even though I add the spices, the mix still smells VERY earthy, like grass. You will smell this on your hair for a day, don't stress, it goes away).2. I washed my hair and made sure there wasn't any products or conditioners in my hair, and combed it smooth.3. I put a couple old towels down and wore an old tshirt, since I heard it can get messy.4. I applied vaseline around my hairline, neck & ears prior to putting my gloves on.5. Using gloves, I started at my roots at my hair line.- I didn't have a coloring brush and just used my hands.- The consistency of the color is thick enough that it isn't drippy.- I actually just grabbed a handfull and squished it from roots to ends.- There is enough product to really massage it through all of your hair.- Once I felt it was fully through my hair, I squished my hair up into 4 buns around my head and added the cap they provided.- I used a hairdryer all around my head for about 5 minutes, then tied a grocery bag up and around the cap, so I was double layered.- btw, there was no mess for me to clean, if you're careful, it won't be a big deal. I do recommend washing your bowl and spoon soon after you're done though for easier clean-up.My hair was a bad ombre when I started, so my ends were lighter. I decided to just leave it on for 2 hours, and used the hair dryer every 20 minutes or so to heat up my head. I was mainly using this product to enrich & condition my hair, so i wasn't really worried about what color I achieved. I was hoping to get a nice rich chestnut/golden brown.After 2 hours I washed it out of my hair, this is a bit more difficult than normal hair dye, as it is basically mud. It was easier than I thought it would be though. For shampoo I used EO Coconut Lemon Bath and Shower Gel & for conditioner I used SheaMoisture Jamaican Black Castor Oil Intensive Strengthening Masque. I left the masque on my hair for 20 minutes. Rinsed and done!My hair turned out a gorgeous rich chestnut color, my curls are va-va-voom and no frizz. It has been one week, and my hair is still just as vibrant. I use that deep conditioning treatment 1x week, to help tame my mane. For your ladies with straight and wavy hair, obviously you could skip that step and just use your normal shampoo & conditioner.I will NEVER get my hair dyed at a salon or buy crappy boxed stuff. Light Mountain is amazing!
Trustpilot
4 days ago
1 month ago