Buy anything from 5,000+ international stores. One checkout price. No surprise fees. Join 2M+ shoppers on Desertcart.
Desertcart purchases this item on your behalf and handles shipping, customs, and support to Kenya.
🚀 Elevate your 3D printing game—fast, precise, and hassle-free innovation!
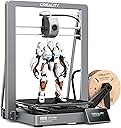
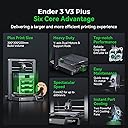
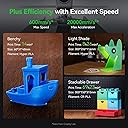
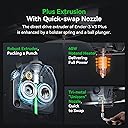
The Creality Ender 3 V3 Plus is a high-speed CoreXZ 3D printer featuring a large 300x300x330mm build volume, 600mm/s max print speed, and advanced auto leveling with a direct drive extruder. Designed for professionals and enthusiasts alike, it offers stable metal construction, a tri-metal nozzle for durability, and easy assembly, making it ideal for rapid prototyping and detailed large-scale prints.


| Best Sellers Rank | #29,311 in Industrial & Scientific ( See Top 100 in Industrial & Scientific ) #38 in 3D Printers |
| Brand | Creality |
| Color | Ender 3 V3 Plus |
| Compatible Devices | Personal Computer |
| Customer Reviews | 4.0 out of 5 stars 921 Reviews |
| Material | Plastic Filament |
| Product Dimensions | 12"D x 11"W x 10"H |
| Supported File Format | GCODE |
R**D
WORTH EVERY PENNY!!!
This is my very first 3D printer. I have no experience whatsoever with 3D printing. This is perfect for beginner's. It has been working perfectly straight out of the box. Set up was really really easy. I definitely recommend this for any beginner. The only calibration I have done on this machine has been the initial setup calibrations and it's been perfect ever since. I will be doing the other calibrations as well as adjusting the speeds. This is a fast printer so i should set it up to do what its built for. Looking forward to playing with the settings! It has auto leveling and i would say durability is fine (had one issue where it sounded like it collided with a train. Turns out the roll of filament was wound really bad from the maker, it literally would not let the extruder move. Keep an eye on them rolls!) It is kinda loud at times but...i live in a studio apartment so...yea. I have been using OrcaSlicer and have not payed any attention to the Creality cloud or whatever it is they offer with the printer. I can access it through the network, start prints and upload directly from the PC/Laptop instead of just the USB method. I love this thing! Its been printing constantly and i already have burned through SO MUCH filaments. Worth every penny! Definitely recommended for everybody and their grandma.
C**H
The Little Printer That Could — and Did!
printer. I thought this would be a weekend experiment that ended in frustration and half-melted plastic noodles. But the Creality Ender-3 has completely changed the way I think about making things. Right out of the box, setup was surprisingly straightforward. The instructions are clear, and I had it printing within an hour (less time than it takes me to assemble IKEA furniture). Once leveled, the first print — a simple calibration cube — came out sharp. Like, “did this really just come from a $200 printer?” sharp. A few weeks in, I’ve printed everything from phone stands to cosplay props, and even a replacement part for my lawn mower. It’s a workhorse. The frame feels solid, the motion is smooth, and with a few open-source upgrades (PEI plate, filament guide, and a little bit of tuning magic), this thing easily punches way above its price point. The community support is another hidden gem — thousands of makers online ready to help, modify, or inspire. It’s like joining a worldwide secret club of creators. Pros: • Reliable, consistent prints once leveled • Endless modding potential • Huge online community • Excellent value for beginners and tinkerers alike Cons: • Bed leveling can take patience the first time (but worth it) • Slightly loud fans (fixed mine with silent board upgrade) If you’ve ever dreamed of turning your ideas into real, physical objects — this is your gateway drug. I started printing as a hobby. Now I’m selling custom designs online. The Ender-3 didn’t just print parts; it printed possibilities.
A**N
Touch screen holder impossible to attach so good luck
Its so simple and well made why did you stop at the touch screen holder. No screw guides ive spent 30 mins struggle to attach the cheap touch screen holder the whole build is a 15 min build just pack with longer screws i see your smart ideas stopped at this part of the product absolutely annoying makes the whole thing dumb to me now
A**D
Great printer for the price
My printer has worked great ever since I got it almost a year ago. I consider myself to be lucky with how little issues I’ve had with it. It was relatively easy to put together once I watched the video on it. I’ve only ever had one print failure and that was the actually the filament itself snapping. As a beginner I was worried about messing things up, but it’s proven itself to be capable and friendly to people still figuring out how to print
D**L
Extremely easy to use.
TLDR: This is a very easy to use 3D printer. I am mechanically and technically inclined so maybe I'm biased, but this was my first 3d printer and I got it working easily. I had three hiccups and resolved every one quickly. I'll explain those below for anyone that wants to know what the experience was like. There are some default settings that can be resolved with youtube and Reddit in a couple of minutes each. Don't panic if you hit a snag. ------------------------------------------------------------------------------ Experience: 1) The box is packed really well. Externally, it was beat up in shipping but when I opened it, everything appeared to be unscathed. Everything was padded or padded and wrapped in foam cutouts. 2) Although the instructions were mostly pictures, it was obvious which pieces belonged where. I only needed a moment or two to understand how the software worked and more importantly, why. YouTube and Reddit will help you a lot if you have questions. 3) I had three issues with my printer when trying to set it up. I resolved an alignment issue by simple observation and the other two with reddit. They were the following: Small and resolved problems: a) The upper assembly with the x & y axis didn't sit flush with the tops of the four extruded aluminum posts. There are brackets that screws fasten through, horizontally, with reference to the ground. Loosen the screws on the inside L-brackets to flush up the assembly. This helps with alignment and to eliminate introducing any mechanical racking/twisting. b) Auto home didn't move the bed up and down, only the carriage moved the x & y axis. A quick search shows a reddit thread where it's fixed by cleaning the excess grease between the threads and the bushing on the z-axis lead screw is. If your machine is off, just rotate the collar and clean the excess grease as the platform travels upward. If it's on, disable the steppers and then rotate the collar. Resolved. c) When trying to pre-heat the bed and nozzle, my machine would power cycle like the mother board was defective. A quick search lead to a different reddit thread about a voltage selector. What I didn't notice during assembly was that a red switched was recessed inside of the metal housing (left of power cord connector) that was set to 230v. I made sure the power switch was off and then I flipped it to 115v, then turned power on. Resolved.. Common themes I found by reading other people's posts about this printer: 1)This printer doesn't have a Bed leveling option in the menu like older models or like some of the videos and threads explain. It has an auto home function. Auto home simply aligns the x & y axis to the back right corner (if you're facing at the LCD) and then moves the bed up the z-axis until the limit switch is mechanically triggered. Then you are supposed to disable steppers and just manually slide the hot-end around as needed. You don't need to flash/update anything; you're not missing anything 2) Leveling the bed is also called tramming. This does not mean level to the ground. This means level or 'co-planar' to the hot-end nozzle. This made sense to be because of machinery that I have for woodworking but it seemed to come up a lot. Here it is for anybody that doesn't know: Your nozzle can place a thin bead of filament a fraction of a millimeter in diameter. Diameter is in reference to a circular or cylindrical object, so width is the same as hight when the object is on its side like a string. So then, if your nozzle is 2.0mm away from the bed surface on one corner and 0.5mm away from the bed surface on another corner, your printer is going to miss the target when trying to precisely place the bead of filament at an x-y coordinate. Alignment is important. To tram or to make co-planar makes a difference in your prints. Those last two probably belong in a reddit thread or at All3DP. Since I noticed a lot of people jump into this as a first printer and don't know, I figured I'd share and provide something here for SEO magic to find.
B**N
Ender 3 V3 Plus: a fairly capable 3D printer, a little poor in design and implementation.
The V3 Plus package suffers greatly in the instructions and directions department; you can tell the guy they hired to write the English instructions does not really speak English. This aspect also applies to UI on the touch screen. Packing was good, my unit arrived in great condition and I was able to setup the unit using only the tools included, although I did use Blue Threadlocker on several components to help ensure lifetime stability. I ended up moving the run out sensor from being mounted on the gantry to the back support leg, and that stopped my PLA from snapping during calibration. Bed plate is removable. I tested the unit with Polymaker Polylite PLA Pro, PLA Pro (the new formula in 2026), HT-PLA, and PETCF-17 to great results after many setting tweaks. Most extensive project I have run was 8”x8” approximately and took 16 hours, and the only issue was that it suffered warp as it rose from the bed on the corner; not quite enough glue. At one point I had to unscrew the bed from the unit, unplug all of the electrical cables and then reseat them to get the printer to read level correctly during calibration and allow the print. I had the Ceramic Heating block fail while heating to 300°C at exactly 200 Hours (smoke, burning electrical smell), and was able to replace that for $30 and it’s like nothing happened 👍. Warranty card English not very good either, seemed like less of a hassle to just figure it out. Look for K1 parts and Bed plates (300MMx300MM)
R**N
What a great printer
The is my first 3D printer so I have no object of comparison, but I've been pretty happy with it with some minor niggling. The only two materials I have printed is PLA and NylonX which have turned out really quality prints when everything is done correctly. Here are my thoughts on making this printer so much better than it already is and for first time 3D printer owners. Assembly: WARNING - the power supply is flipped to something like 235V out of the box. If your house is running 110V, you need to flip the switch on the back of the power supply FIRST! The printed assembly instructions were fine and easy to follow. In a couple of cases, it was easier to have another set of hands though, but overall, it's just screwing things into place and getting the wiring correct. All of the wires are labeled so you just need to pay attention. Don't be too concerned about the nest of wires hanging everywhere when assembled but do pay attention to how you routed them. If done incorrectly, you can have one of the wires yanked out while the nozzle or the bed moves. Also, the spool holder is shown in the instructions to be assembled on the right side of back right post, extending the foot print of the printer sideways. You can rotate the spool holder to the inside of the back right post (see my picture) making the width of the printer no wider than where the LCD screen is mounted. First steps: Watch some videos on how to level the bed. I've been using the 'paper method' with an index card and it's worked out great. Get familiar with some terminology so you can easily research what problems you may run into correcting your prints. Some terms off the top of my head: STL, gcode, slicer, extrusion, (x,y,z) axis, PLA, ABS. Upgrades: The two upgrades that I would recommend maybe even before your first print is a glass bed and stiffer bed springs. If you're going to use glue or hairspray for better adhesion, the glass bed is easy to clean and the stiffer springs means less bed leveling between prints. I tried for an entire day to get the BLTouch to work and decided to just keep it disconnected. The instructions from Creality mentions a Z OffSet setting that's missing from their firmware and I went down a rabbit hole of recompiling new firmware that still didn't resolve my problem, so I would skip this unless you have a compelling reason to use it. Additional thoughts: just use Cura as your Slicer and skip the Creality one which is just an older version, reskinned version of Cura. Look up "Upgrades for Ender 5" for some ideas of what you can add to your printer (like the tool holders and LCD panel cover in my picture). Join /r/FixMyPrint, /r/3Dprinting, and /r/ender5 on Reddit for helpful resources and tips. The firmware that came with the printer is fine so don't worry about flashing it with anything new. The microSD card has a few STLs on there you should print first with the filament that came with the printer or look for benchy on Thingiverse.
J**R
Definitely recommend
This was my first printer it's been super reliable. I mainly use it for minis and terrain for a ttrp campaign that I'm running. The prints look good, it's fast enough for what I use it for, and haven't had a lot fails. Really the only time it fails is when I try to print smaller minis with finer connection points (like wings). It was easy to set up and get printing, I think it took me less than a half an hour to get going. The slicer, for me, is easy to use. Definitely recommend picking this up if your new to the hobby, or if you're looking for a printer that just works.
T**Y
Ottimo acquisto
È stato un regalo ed io non ne capisco molto, ma l'ho vista in funzione secondo un mio parere e' perfetta
S**.
Superb printer for the money
This is my first printer, I never printed anything in my life, and glad I opted for this model as it comes with all the upgrades that are usually done to the standard Ender-3 so it is quite future proof. Got it up and working in a few minutes. Lots of videos on YouTube showing how to set it up, should you need to. Properly calibrate the bed and Z-offset and you're done. You do need to watch the first layer and calibrate the Z-offset on the fly, again watch videos on YouTube that show how the first layer should be. I ordered it 21st June around 7pm, I received it at 8am today 29th June.
A**M
Una impresora 3D versátil y confiable para creadores de todos los niveles
La Creality Ender-3 S1 Pro es una gran elección tanto para principiantes como para usuarios experimentados en impresión 3D. Ofrece características avanzadas que hacen que el proceso de impresión sea más eficiente y los resultados sean de alta calidad. Lo que me encantó: Calidad de impresión excelente: Gracias a su sistema de extrusión directa "Sprite" y su hotend mejorado, las impresiones son muy detalladas y consistentes, incluso con materiales más complejos como TPU o ABS. Montaje fácil: Llega casi lista para usar, con un diseño modular que facilita el ensamblaje en poco tiempo. Ideal para quienes no quieren complicarse demasiado. Nivelación automática: La función CR Touch hace que el proceso de calibración sea sencillo y preciso, eliminando la frustración de nivelar manualmente la cama. Compatibilidad de materiales: Puede manejar una amplia gama de filamentos, incluyendo PLA, PETG, TPU y ABS, lo que la hace muy versátil. Pantalla táctil a color: La interfaz es intuitiva y fácil de usar, lo que simplifica mucho el ajuste de configuraciones y el monitoreo de la impresión. Cama de impresión flexible y magnética: El recubrimiento de PC facilita mucho el despegado de las piezas terminadas. Aspectos a mejorar: Precio algo elevado: Es más cara que las versiones básicas de la Ender-3, pero la calidad y las características adicionales lo justifican. Ruido: Aunque no es extremadamente ruidosa, podría ser más silenciosa comparada con otras impresoras de gama similar. Documentación técnica: Aunque el montaje es fácil, el manual podría ser más claro en algunos aspectos, especialmente para ajustes avanzados. En resumen, la Ender-3 S1 Pro combina facilidad de uso con características avanzadas, lo que la convierte en una excelente opción para quienes buscan calidad y versatilidad en la impresión 3D. Totalmente recomendada tanto para principiantes como para creadores avanzados.
A**R
Ótima qualidade
Funciona muito bem, relativamente fácil de montar e como um iniciante posso dizer que não foi difícil me acostumas a usa-la, recomendo muito a compra principalmente por conta dos vendedores com um suporte excelente que me ajudaram em tudo que precisei de forma rápida e educada, desde funcionamento a reposição de peças
A**O
Gran impresora
Grn impresora para empezar en este mundo
Trustpilot
2 weeks ago
2 weeks ago