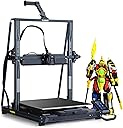
(Skip below to ger right into the review and some helpful tips) I have been using 3D printers for quite some time now. My first unit being an ender 3 v2 right after it released. My next was a CR-10 clone made by SUNLU called the S8. Even with the S8 being a CR-10 clone it was still considerably easier to set up then this Neptune 4 Max and the Ender 3 was miles easier then the Neptune 4 Max. But what I have learned is as the bed size gets larger the setup becomes more complex. I used my Sunlu S8 for many years. Unfortunately it was becoming long in the tooth. It was a bowden extruder for one, completely manual leveling and was marlin. Parts were starting to wear out on it. I was considering bringing it up to modern standards but that would have gotten me halfway to the price of a new printer and I would still be left with a knock off CR-10. Doing my research brought me to this printer. On paper it has everything you would want. Excellent build quality, filament run out sensor, Wi-Fi-Ethernet, Klipper, a nice build plate, auto leveling with the ability to manually level to hone things in, a really nice touch screen and lastly a huge build volume. With all of this awesomeness comes some serious challenges though at least for me anyways. (REVIEW) Now I'm not here to tell you I'm the world's most knowledgeable at 3D printing. Infact I'm just constantly learning. Being that my CR-10 clone was so old and that it was still on marlin the user interface is completely different and a little more complex. I also had to swap over to Orca slicer as well. Apparently the world has moved on from Cura and I have been stuck in the past. All of these things work well but also come with a learning curve. If this is your first printer be prepared to spend days just learning before you get your first clean print. Even after all these years of 3D printing it took me a good six days to get a clean print. (SETUP) This is where things get a little complex with this guy. Actually putting it together only takes about an hour. But calibration takes much, much longer. None of my belts came tightened to the right degree so I gave them a bit of a tightening by hand which is easy enough with both of the belt knobs. I honed them in during prints to get them spot on. The real hastle here is bed leveling! Bed leveling on this machine is far harder then any machine I have ever had. This is probably down to my own skills. To be honest on my other machines I would just manually level it until it was close enough and use some glue stick to make my prints stick. Close enough doesn't work on this machine. You are going to have to be within spitting distance of perfect. First thing I did was swapped out the included springs with silicone springs. The standard springs are fine at first but they always wear out quickly leading to having to constantly level the printer. The silicone springs should mean that once I get it leveled it should last for a very long time plus they won't wear out. Then you must and I do mean MUST let the bed heat up and the nozzle heat up for a full half an hour. This gives everything time to expand to where it's going to be while printing. I'll tell your right now if you skip this step you will have problems with adhesion. Then I did a manual level first. I tried the old paper method but I was having terrible luck. So I went out and purchased a set of feeler gauges. For me the feeler gauge is almost a necessity for this thing (again that may be a skill issue on my part). Using the feeler gauge and getting a small amount of resistance between the bed and the nozzle got this thing really level. I had to go around the whole bed probably two or three times slightly adjusting each leveling wheel until it was perfect. At that point I went into the advanced settings and turned on Professional mode for the auto bed leveling. This gives the machine over 100 points while automatically leveling instead of just over 30. This made a huge difference for me. At this point it was time to let it auto level. That process takes right around ten minutes. After it's done it prompts you to adjust your Z Height Offset. You have got to get this at least in the neighborhood of right in order for your prints to stick. It doesn't have to be perfect, you can hone it in on the fly while printing. I just used the 0.1 option to make the nozzle touch the bed and then used the 0.01 option until I could get my feeler gauge under the nozzle and get a small amount of resistance, and by small I mean small. You just want to feel that nozzle dragging across the feeler gauge as you pull it out. At this point I removed the magnetic build plate and washed it in the sink with dish soap to remove any oils from the factory or my hands. It seems like overkill I know but this build plate doesn't seem to want to work as good unless it's really clean. At this point I sliced some test prints. I watched as it laid the first layer down and slowly honed in my Z height until I could see the filament was making nice fat lines on the build plate. I would use my finger nail on the exposed areas of the print to gently rub across the print to see how it was sticking. After getting my Z height just right I was really happy with how prints stick to the build plate on this. At least for PLA no glue or hairspray is needed once you have this leveled right. I did a large print that took about 30 hours and did notice I was definitely getting some layer shifts happening. After some investigation I realized my belts were still a bit loose, tightening these fixed that issue all together. I also had to work with my fan speeds, printing temp, print speed and extrusion amounts because none we're set right in Orca Slicer or the machine at least for the filament that I was using. Also, this machine can print fast, very fast infact but I was having terrible results above 70% of full speed. I can't see getting good results at 100% unless the geometry of the print is very simple or you have skills that I just don't have. For me printing at 210 degrees with the fan at 30% on silent mode at 70% speed gave me the best results so far. That is probably going to be different for everyone though. After that point my prints were very clean! The filament sensor also worked really great for me. My old CR-10 clone also has a filament run out sensor but it always left a small gap when it would resume after changing filament. That didn't happen with this, to my eyes it looked like the print had never stopped at all. The biggest game changer for me with this printer is the fact that it has WiFi built right into it. All you need to do is go into settings, connect as you would on any device and then take note of your printers IP address. You can put that IP into Orca Slicer and then you'll be able to send prints from Orca directly to your printer! No SD card, no thumb drive. This was amazing to me and it works really well! Lastly, I want to just talk about the printer itself. First your going to want to make sure you have a space big enough for this absolute monstrosity of a printer. This thing is massive. It is probably twice the size of my CR-10 clone. It takes a lot of space but you can pretty much print anything you can imagine. Probably even a toilet seat if you wanted to. It is also by far the best built 3D printer I have ever had. The fit and finish here is amazing. It even has a little drawer for your tools if you have the max model. (Conclusions) So far I am really enjoying this printer. Some say this isn't a good model to pick for beginners. Infact I have heard many people say that no large format printer is good for beginners. I disagree with this just be prepared for a large learning curve, some failed prints, hours of YouTube tutorials and lots and lots of calibration. But even if you're a beginner don't write this printer or printer line off. Don't let the negativitie reviews scare you either. That said this is a very difficult printer to get going. At least it was for me! I think some of this comes down to the size of the bed and some of it comes down to my skills. This thing prints very well once you do get it going though but it's not an out of the box experience. No printer is but this one was less so for me. That being said once it is set-up you'll be good to go for a long time and will just have to make small adjustment once it does need leveled again. It has been my experience for most negative reviews of 3D printers that I have read it was simply the case that the printer just wasn't set up correctly. I think that is the case with this printer as well. If your willing to take on the challenge of getting this thing going then I think you won't be let down!