🐶 Let Your Pet Roam Free with Style!
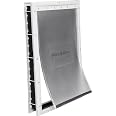
The PetSafe Never Rust Plastic Doggie Door is designed for large pets up to 220 lbs, featuring a customizable paintable frame, easy DIY installation, and a secure snap-on closing panel. Ideal for both interior and exterior doors, this door combines functionality with aesthetic appeal, ensuring your pet enjoys freedom while maintaining your home's security.


| Frame Material | Metal,Plastic |
| Material Type | Plastic |
| Color | White |
| Maximum Compatible Thickness | 2 Inches |
| Weight Capacity Maximum | 220 Pounds |
| Minimum Compatible Thickness | 0.06 Inches |
| Size | Extra Large |
| Dog Breed Size | Large |
| Closure Type | Snap |
B**N
Good
I had this installed for about one year it works great my dog outgrew it and ended up tearing it up. They just did not have a bigger size so I went a different route for a smaller dog. I could see this last thing a long time.
I**K
Simple installation and great for a bedroom door.
We have 7 dogs and they range from 20 pounds to around 110 pounds. They all come through the door just fine. Even the 110 pounder has lots of extra room to fit through. I have installed many doggy doors throughout my house and in both of my outside doors. This certain doggy door is great for an inside door. For outside doors, I use weatherproof doggy doors. The flaps are heavier and most normal winds will not blow them open.To install the door, I did the following:Remove the door from the door frame and lay it on saw horses or whatever you have to work on. It needs to be at least a foot off the ground to complete the install. Mine was about 3’ off the ground. This keeps you from having to bend over so far to work on it1. I measured the height of my largest dog standing at her shoulders, then added 2” to give a little extra clearance. I took a pencil and made a light straight line across the door at that point.2. Next, I measured the width of the door and marked the center from the top line down to the bottom of the door.3. Next, I laid out the stencil, that comes with doggy door, and lined the center arrows up with the center line on the door and the top of the stencil with the top line I made going across the door. I held the stencil in place with some masking tape. 4 little pieces will do the trick.4. Next, I traced around the stencil with a black sharpie. This makes it easier to see where to cut the door out. Don’t worry about the black lines, what’s left of them will be hid by the frame of the doggy door. Remove the stencil when done.5. Next, I used a 1/2” drill bit and drilled a hole inside each of the corners of my lines, getting as close to the corner lines as I could.6. Next, I used a jigsaw and cut out the hole for the door. Stay on the lines as best as you can and make sure the foot of the jigsaw is flat so your cut will be straight through to the other side. When I got both sides and the bottom cut, I used a screwdriver to hold the bottom of the piece I was cutting out so it didn’t fall when I cut the top. If it falls before the cut is finished, it could break off a piece of the main door. That will make it look bad with a chunk missing out of the main door when you are finished.7. Next, measure the thickness of the main door and write it down. Add 7/8” to that measurement. My door thickness was 1 3/8”. I added 7/8” to that and got 2 1/4”. That is how wide I cut the plastic spacer pieces that went between the frames of the doggy door. Try to be as accurate as possible with this. I used a utility knife to cut the spacers. Take your time so you can make straight cuts. Make several cuts on the same line, then fold it over and it will break apart on the cut line.8. Slide the plastic pieces into the slots of the front frame section. Push them in tight. Set the frame in the cutout section of the main door. Then, install the back frame section by lining up the plastic spacer pieces with the frame slots and hold them tightly together. My wife helped me with this part by holding the frames together as I installed the plastic screws and nuts in the frames. I put the top center one in first, followed by the bottom center one. Slightly tighten these 2 but not too tight, you may have to adjust the frame position. After that, she didn’t have to hold it any more. I installed the rest of the screws and nuts. After making sure I had the frame squarely adjusted, I tightened the screws and nuts.9. With a pair of wire cutters, cut off the excess of the plastic screws. Next, I used a Dremel with a cutoff wheel to grind the rest of the screw down flush so the dogs wouldn’t scratch themselves on them.10. Clean the sawdust off the door and install it back on the door frame that you removed it from.
A**R
Great Door. My Impression of Installing By Myself
40s female and I installed two of these doors on the same afternoon, by myself (in case any ladies out there are wondering if they can do the installation on their own). First door took me about 3 hours and second door took me 2.5 hours. This is probably slower than most but I took my time measuring, making sure it was level, being safe with power tools I had never used before, etc. I highly recommend buying a jig saw or similar tool. I got one for $50 that got the job done just fine. The instructions are clear but I would recommend taping the pattern to the door and doing the tracing prior to taking the door down. I think the first pattern was slightly off because no matter what I did, I couldn’t get it level with the pattern. I finally just created the top line by using the level. Highly recommend a longer level. My doors are solid wood and pretty heavy so they were a little difficult to move on my own. Using the jig saw was easy but I should have bought more blades. I used 3 blades and the third one was pretty dull at the end. I used masking tape to hold the plastic inserts in place prior to putting on the back piece cause otherwise they just fall out. The plastic screws are awful. Hands down the worst part of this. It may seem like they go in but they are flimsy and bend. I would put one in and barely get the washer on and then do the next. Then I went back and tightened them all. I used a drill to make tightening faster. I did over tighten one and it broke. My doors have decorative panels that created gaps so I put foam and weatherproof stripping around the gaps. Then I sealed all edges with caulking. Doors work perfect.
M**D
human size dog door....UPDATE....
DIDNT LAST AS LONG AS EXPECTED. THE ENTIRE FLAP JUST CRUMBLED APART .DONT BUY PLASTIC IT ROTS FAST. We have a 75lb mixed mut of idk what. hes tall and skinny. he was always ducking down to go threw the old dog door and is getting older and starting to have problems using it. so we upgraded this door is massive but what he needs. i like the tinted opaque door, fairly easy to install if you follow the template. magnetic bottom works great , not to impressed w the long plastic screws but a great priced door
M**E
Pet Safe is a good brand
I'm sure it was great but had to return, too big for our opening that was available.
Trustpilot
1 month ago
4 days ago