


⚡ Unleash the Power of Electric Riding!
The EBIKELING Waterproof Ebike Conversion Kit allows you to effortlessly transform your standard bicycle into a high-performance electric bike. With a powerful hub motor available in multiple wattages, an easy-to-install design, and a comprehensive LCD display for tracking your ride, this kit is perfect for cyclists looking to elevate their biking experience. Note: Battery and tire not included.
| Brand | EBIKELING |
| Material | Aluminum |
| Brake Style | Works with Disc, V, Caliper, Cantilever |
| Bike Type | Electric Bike |
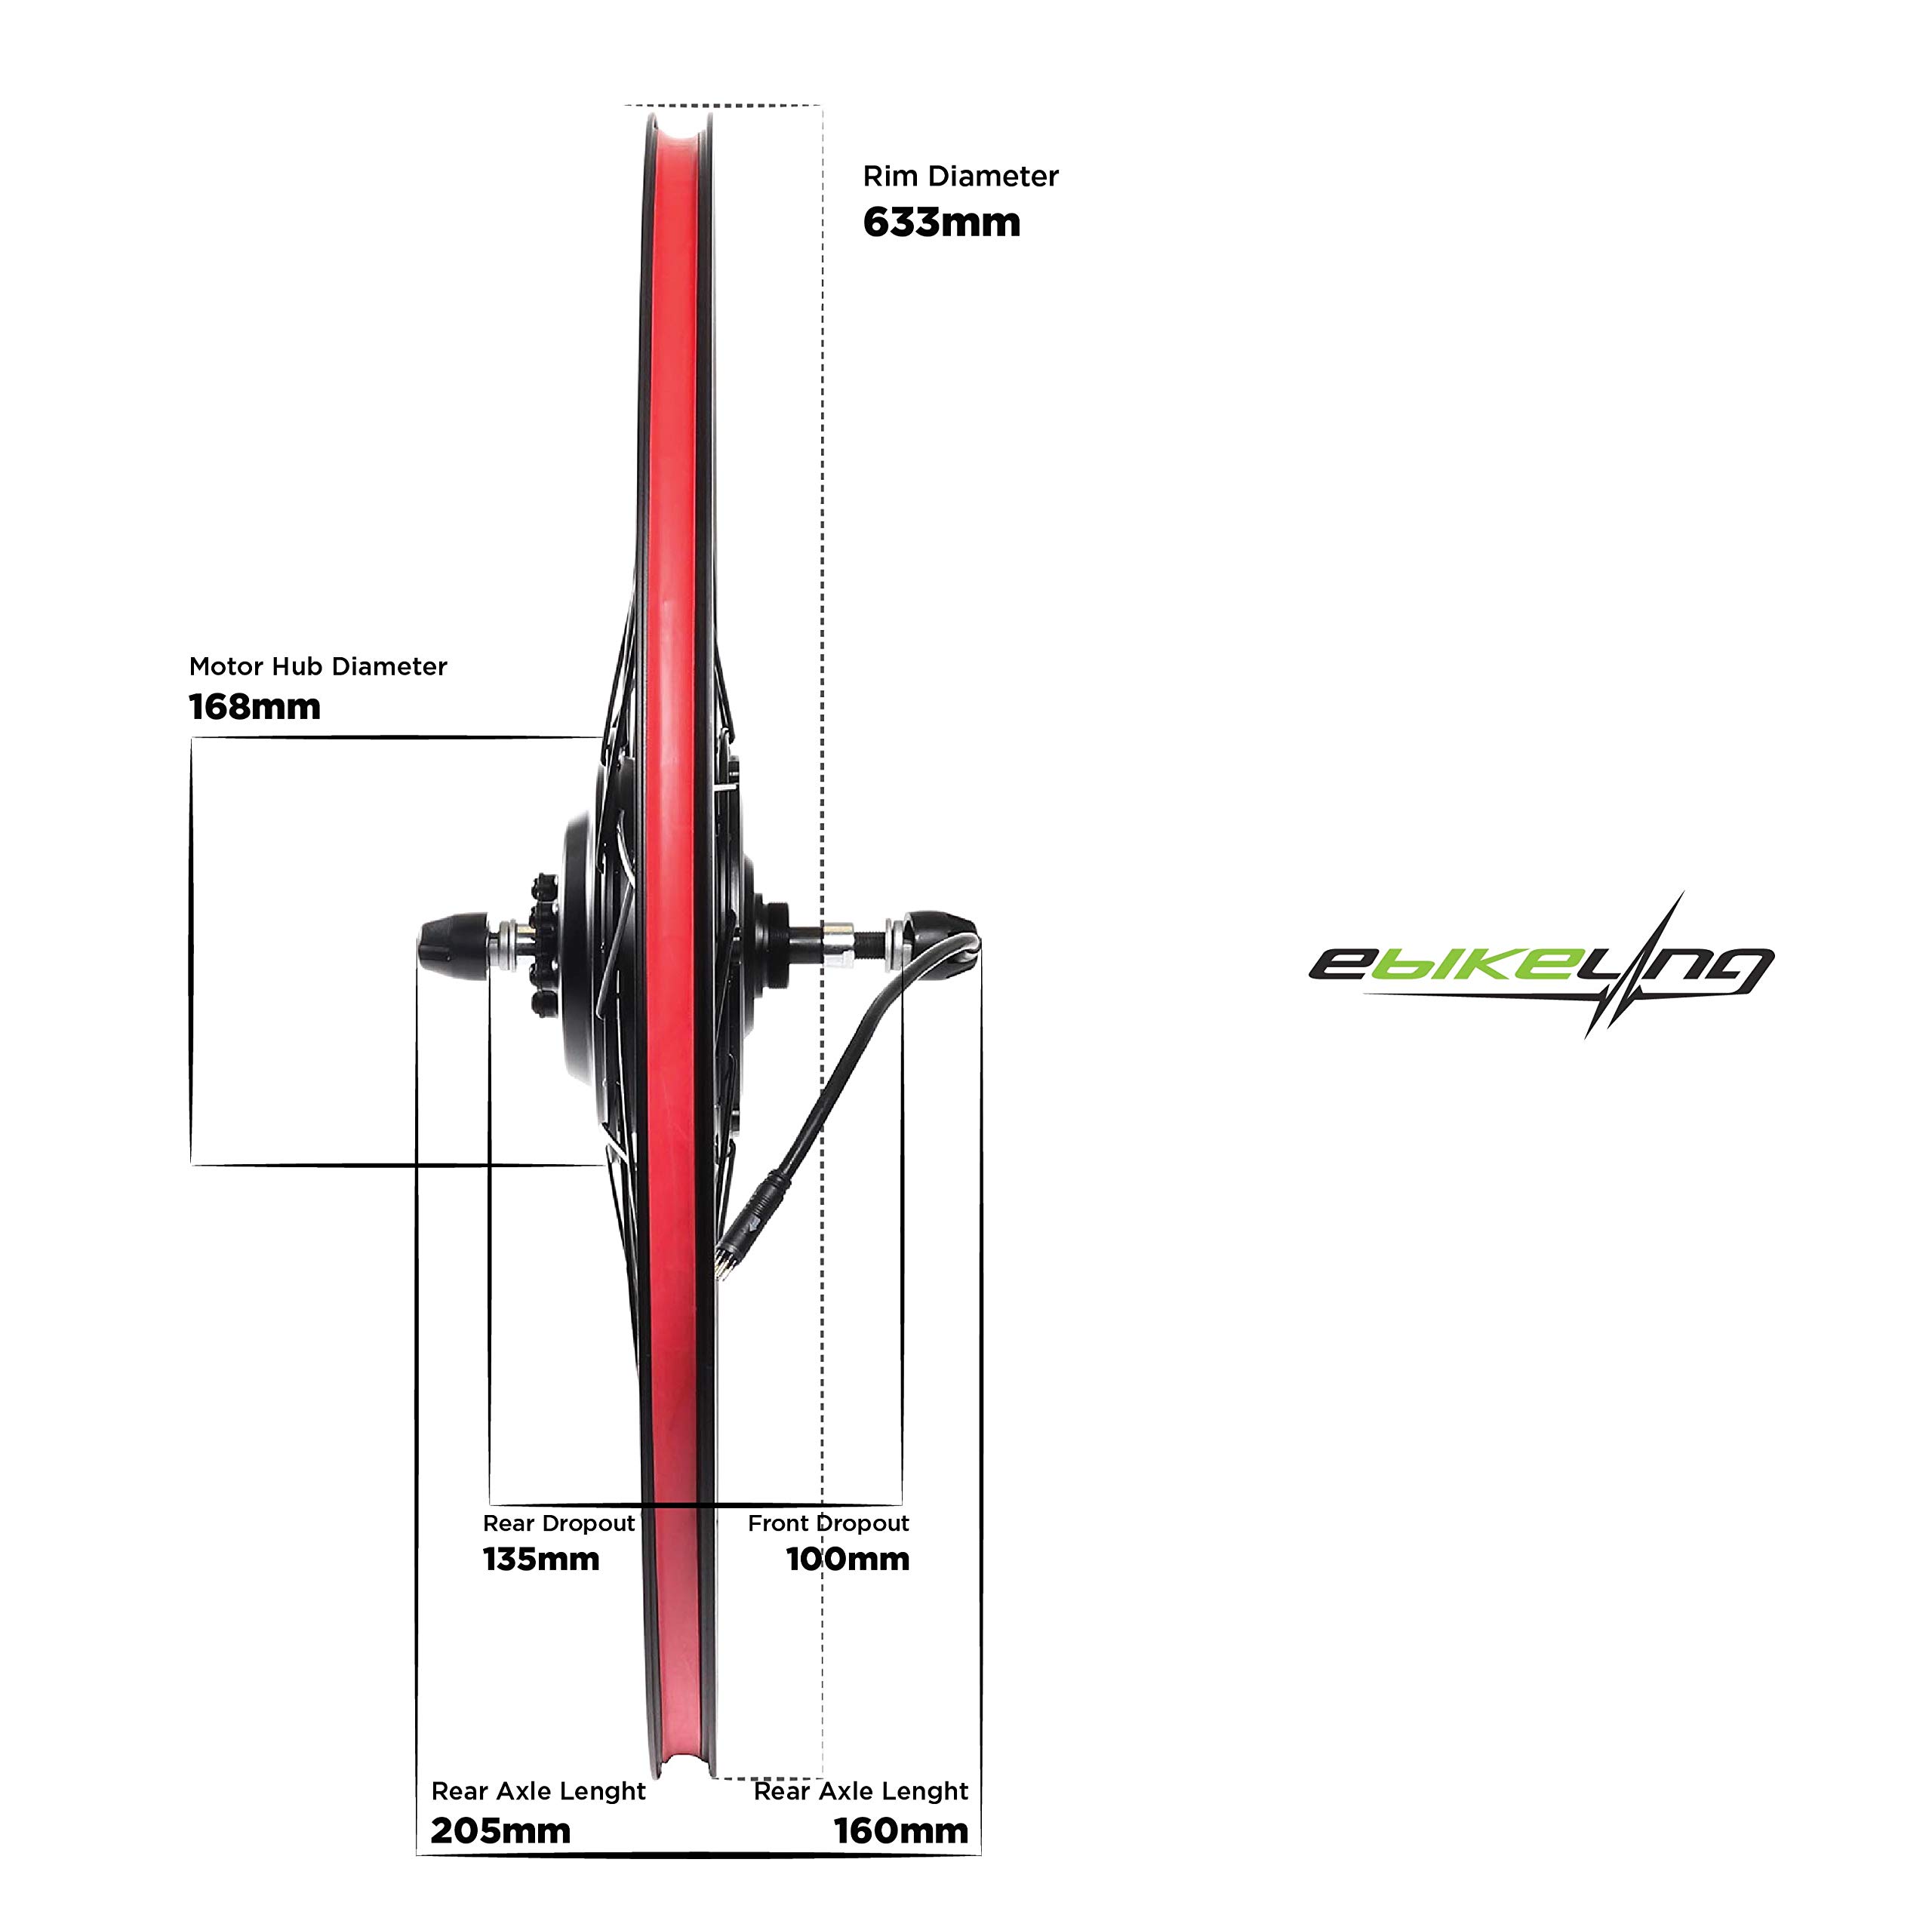
| Wheel Size | 29 Inches |
| Item Weight | 17.2 Pounds |
| Item Package Dimensions L x W x H | 26 x 25.6 x 8.8 inches |
| Package Weight | 7.98 Kilograms |
| Brand Name | EBIKELING |
| Manufacturer | EBIKELING |
| Part Number | 750w700C |
| Style | 750w |
| Size | Front |
J**S
Works very well! Super heavy though
The 1200w front motor is strong but compared to the 1500w rear motor (different brand, CSC); it’s a night and day difference when using just the front vs just the rear. Obviously running both at the same time is the preferred option and is how is run them but the amount of power it puts down compared to the rear surprised me.The power readout shows 25Amps which is. 1,300W when running at 52V, so it’s puts the power down still. Given the weight of my dual motor bike and it’s distribution the front wheel doesn’t have too many opportunities to spin out but if you don’t have the front weighted down it will burnout often!The motor/controller seems to sense when the motor has too much resistance to turn and opts to cut power vs cooking the motor.Pros:- Waterproof connectors that are small and clearly marked by color- Small controller that is waterproof with the exception of the XT60 connector- High quality rim compared to the CSC kits I’ve bought the Alexrims brand appears to be higher quality and wasn’t full of loose spokes like the CSC kits we’re. It’s still needed to be trued but in general it was ready to roll, whereas the CSC was a straight up hazard.- Top speed of 42MPH @52V- Can run at 52VCons:- Really heavy!!! My front suspension fork does NOT work properly after installing this motor. However, given it hasn’t broken yet and I climbed a small mountain 3 times and ride the stupid thing at 40MPH constantly I can’t complain too much. There is no way this SR suntour X1 was intended to have so much weight on the top (I’m 230Lbs w/kit on and 25Lbs of battery) plus a heavy motor spinning at high RPM ripping it up rocky fire roads. Definitely use the torque arms provided! They come with “C” washers which basically guarantee the axle won’t come out of the dropout unless one of them snaps. Can be a pain to remove but totally worth it.- Not as much power off the line as I expected- Front motor brake caliper fitment might be a problem. Had to ditch my bikes Tektro hydraulic brake for a garbage tier Walmart cable caliper. Tried a tektro cable caliper but that was still a good bit too large. The width is the issue since it runs into the motor, tons of space with the original wheel. So budget for the possibility of needing to swap that out.TLDR: Buy it if you need a 29” front motor since it’s your only option that is 1000w+Overall very well worth the extra cost to have the higher quality connectors, better rim, and a smaller controller footprint
K**L
Great kit overall, but do your homework and don't expect much in the way of customer support...
Great overall kit for the money, but be ready to figure things out on your own. Once it works, it works great... exceeding my overall expectations. I had reservations buying this kit but was pleasantly surprised by the overall quality. Fast delivery. I can scoot along at 35 mph on the flats easily.SOME THINGS TO WATCH OUT FOR THAT CAUSED ME HEADACHES INCLUDED:Packaging - Overall was good, but the LCD arrived with a deeply scratched display panel. I figured that IF it worked, it would get scratched anyway, but disappointing to see it arrive that way.Instructions - Were pretty sketchy overall. Be ready to try and "figure things out" on your own. There are a lot of video's on Youtube, but you will not find everything you need and will spend quite a bit of time searching for the answers.Customer Support - Tried reaching out through e-mail and via phone. Didn't get a response, so just kept plugging away trying to find the answers. Error code 6, error code 9, motor wouldn't work (at all), etc. Luckily I did a lot of research to find answers by Googling around. Don't plan on spending just one hour on a quality installation because it won't happen in an hour... it will take longer (or, at least it will LOOK like you only spent an hour).Colored Plugs - I figured that colored plugs would solve a lot the guessing. WRONG! Murphy's law... just know that all plugs that are colored alike should NOT necessarily go together. I my case, the 4 orange plugs (2 male and 2 female ends), were reversed from the correct setup... they fit, but they shouldn't go together. After getting out my microscope and carefully reviewing the pictures, I noted that they were reversed. That problem was solved, then I had to solve the biggest problem...Main Power Plug - The console worked, so I figured that everything must be connected properly... NOT! My biggest challenge was trying to figure out the reasons for Error Codes 6 and 9. Come to find out, the main power plug was not fully seated. Many descriptions of the problems with these kits describes checking the plug connections. I finally noticed that the main plug was not seated to the tiny stop line. I tried everything I could to push that sucker together (without damaging the wires) and could not get it to seat. After spending 15 minutes trying (unsuccessfully by hand) to get this plug pushed together, I finally figured out that I could use 6 zip ties (two tightly wrapped around the wire near the plugs and 4 zip ties strategically placed on each side around the two wires to "cinch" the plug together... one... click.. on... each... zip... tie... at... a... time. I carefully and methodically worked my way around the plug until it was fully seated. VERY DIFFICULT TO SEAT THIS PLUG PROPERLY WITHOUT DAMAGE! I tried several types of lube, with no luck until I figured out the zip tie trick.Challenges for my particular bike included (no fault for the manufacturer) included:PAS - Most bikes come with a "lock ring" on the bottom bracket (picture #4)… mine has a sealed bottom bracket without a lock ring. With no way to "lock" the PAS pick up sensor, I had to innovate a mount. I ended up drilling a tiny hole in the frame and grinding/filing/cutting/angling/tapping the hole for the sensor attachment to directly attach to the frame. A lot of eyeballing and guess working to make it fit properly, but got it done. Since there was no lock ring for the BB, I also didn't have enough clearance for the PAS magnet ring behind the pedal crank to go back on the bike, without rubbing on the frame. I put about 5 wraps of Plumber's Teflon Tape on the BB in order to offset the crank arm just enough to leave room for the ring... time will tell how long that lasts.Not to badmouth a good kit, just know there are challenges that will take some time and patience to figure out. If you have a mechanical mind, or a handy buddy to help you, then you will be better off.
Trustpilot
1 month ago
1 month ago