


Illuminate Your Life with Style! ✨
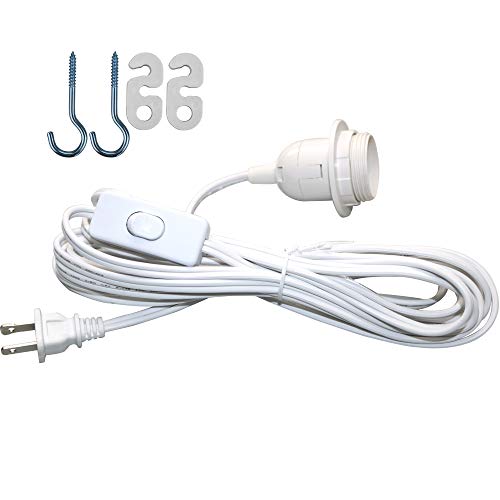
The 20" Ceiling Pendant DIY IQ Jigsaw Puzzle Lotus Flower Lamp Shade Kit by Lightingsky is a versatile and stylish lighting solution. It includes a 15-foot hanging cord and is designed for use with CFL or LED bulbs (not included). Made from durable, washable polycarbonate, this lamp shade is perfect for both indoor and outdoor settings, making it ideal for home decor, parties, and events.
| Brand | Lightingsky |
| Color | White |
| Material | Plastic |
| Style | 现代 |
| Light fixture form | Chandelier |
| Room Type | Bedroom |
| Product Dimensions | 12.5"L x 9"W x 1.5"H |
| Specific Uses For Product | Shop |
| Indoor/Outdoor Usage | Outdoor |
| Power Source | Corded Electric |
| Special Feature | Energy Efficient |
| Light Source Type | LED |
| Shade Material | Polycarbonate |
| Number of Light Sources | 1 |
| Voltage | 110 Volts |
| Theme | Floral |
| Shape | 锥形 |
| Included Components | 安装硬件 |
| Item Weight | 1.2 Pounds |
| Number of Items | 1 |
| Controller Type | Push Button |
| Switch Type | Push Button |
| Unit Count | 1.0 Count |
| Water Resistance Level | Not Water Resistant |
| Mounting Type | Ceiling Mount |
| Shade Color | White |
| Fixture Type | Non Removable |
| Assembly Required | Yes |
| Model Name | 02000 |
| Manufacturer | Lightingsky |
| Part Number | 43221-3709 |
| Item Weight | 1.2 pounds |
| Country of Origin | China |
| Item model number | 43221-3709 |
| Is Discontinued By Manufacturer | No |
| Item Package Quantity | 1 |
| Number Of Pieces | 50 |
| Plug Format | A- US style |
| Special Features | Energy Efficient |
| Batteries Included? | No |
| Batteries Required? | No |
D**A
Like it
I like this puzzle lamp. Great deal, unique, and easy to put together. I think I want more.
E**D
Really beautiful Lotus Flower Shade! I bought a 2nd one already! Bad Instructions so Helpful tips enclosed for you below ~
This is such a lovely lamp (first I ordered one to hang over my stove in the kitchen), that I ordered a second one for my living room.It looks lovely both on or off. Truly makes me happy to see it - Despite being made of a thick vellum like or frosted white plastic, once completed it adds a very contemporary chic look to a room.I did mine in reverse order so the flower blooms up and out rather than hanging downwards. Also I made sure to crimp all the petal edges when folding them because I knew I wanted a sharper petal look than pictured on the product page however what is great about this is that if you love the lamp and want more in your home you can try the different directions of the petals and sharp edge and soft edge versions for multiple looks around the house, using this same kit.The instructions need massive improvement to make assembly easier and avoid mistakes. The instructions are currently just a sheet of paper with drawings - no words - no step by step descriptions, just pictures and the instructions don't show (even in its pictured steps), the light bulb fixture holder / lampshade center "O-ring" at all as part of the assembly or an enclosed part! Its the most important part and part of step 1!- So now I completely understand why other people assembled the center column without the O-ring inside it, and then wondered where or how the light bulb fixture gets attached. All that confusion could be removed if they simply had steps with words and a parts list that shows the most important part of the whole shade - the light socket O-ring!!!So below are some mentions which may be helpful to others that I ran across when I assembled my first shade -You will need to start assembly by finding the light bulb socket O-ring holder piece - (you will find it hiding among the packs of flat petal packs.The other piece required for the first step will be the flat sheet in the kit which will become the column.The O-ring (light bulb socket holder) needs to be inserted into the sides of the column sheet as you curl that column sheet around to form the column. This is important to know now because the instructions don't mention the O-ring at all and yet if you lock the column tabs together to create the column without the O-ring inside it, it would be impossible to insert the ring afterwards because it has three tabs which insert into the inner sides of the column as you curl that column sheet up to lock its sides together.Also - take note that when the column is completed and in front of you the O-ring should be at the top of the column. Then you will have the correct orientation to start the petals. With the O-ring at the top end of the column you will see how it will look hanging down from the ceiling.Something that may not be obvious to some as it wasn't to me at first was - after you insert the 1st petal of a row, into 2 slots (each petal has a tab on left and ride side of the petal) expect for the next petal to insert one of the 2nd petal's tabs into the same slot as the last petal. So they share slots as you work around the row. (So as an example - the left side tab of petal 2 will go into the same slot used for the right side tab of petal 1). At the end of a row of petals, if done properly you will see zero gaps and won't be able to see the column through the row of petals once you complete one row.When you get the package you will see- A flat sheet which will become the column center of your lampshade.- The plastic O-Ring I mention before which goes inside the column as you create the column, and which holds the light bulb socket in place in the lampshade at the end.- 5 rubber banded packs of flat petals. Each pack is one number/size Sizes 1 to 5. There are 5 sizes of petals. The number size is embossed on each petal if for some reason you get them loose and mixed up. (look to left tab top for the embossed number if needed.)These petals need to be folded at the creases to create the 3 dimensional petals.Each pack of one sized petals, has enough petals for one row, except for # 4 which has more petals because #4 will be used for two rows.To start with I suggest to make it all goes smoothly and neatly -Have something such as tweezers available for the first step which starts with assembling the column - so you need the flat sheet and the plastic light bulb fixture holder O-ring.Take the flat column sheet out and poke through all the little slot pieces of plastic which you need to remove to insert the petals and light bulb ring. I found using the blunt end/handle end of tweezers worked well.Doing this upfront will allow you to remove them neatly and not damage the sheet/column at all, and will make the petal inserting process go quickly and neatly.Take the plastic O-ring, which will hold the light bulb socket, and put one of its 3 tabs into the correct slot on the column sheet, and curl the column sheet around the O-ring, making sure the column sheet is curled around tightly enough so that all three sides tabs of the light bulb O-ring stay inserted into the column sleeve.Then you must hold this together for the only tricky or difficult part of this whole assembly which is locking the two sides of the column sheet edges together to form the column, while holding it closed enough to keep the O-ring tabs in place inside..The way you need to lock the column sheet together is inserting one side of what looks like dovetail jointed tabs into the other side of opposite type tabs. They don't slide into each other. You need to hold the column closed (keeping the light bulb ring in its slots at the same time) as you gently bend the sides of each tab so you can maneuver it into the opposite side's space, as you work along the entire edge locking all the tabs to the other side. I manage to do this alone by using my lap and holding it against my stomach so the column didn't uncurl during the process too much which would have the light bulb ring come out of its slots.Once done I took the time to take each size of petals I would work with per row and pinch the seams tightly for nice crisp edges and a crisp pointed end (my choice for the overall petal look, pls see my pics versus the softer edge look of the product page to decide which one you would prefer) and inserted the top row (side of column pointing up to the sky where the ring is) and worked downwards per different size. one size per row at a time using one hand inside the column for support so I could press against the column to get the petals inserted as the rows grew because as the rows grow the hand inside the column will help you as a support.Then last step will be unscrew the plastic ring at the bottom of the light socket, hold the socket through the top of the column , against the top of the inside plastic O-ring, and from the bottom of the column, go up inside and screw that plastic ring back onto the socket base and onto the plastic O-ring inside the column - that is how the lampshade holds onto the light bulb socket. Then the light bulb would go into the socket afterwards, as last step.I saw pictures on another page in which the flower was done to look like a blossom growing upwards instead of the picture here and as the instructions would have you do, which is the blossom hanging downwards. I loved the look so much (was on a floor lamp so they chose to do the flower blooming up towards the sky), that I chose to reverse the order of the petals on mine for my ceiling shade so that the flower blooms up and open skywards too. . Love how it looks!If you would like to do the same, the order for a flower hanging downwards as per instructions is- starting at the top of the column working downwards would be # 4, #5, #4, #3,#2, #1but for a flower bloom growing like in nature, upwards so smallest petals at top, you would do the petals starting at top (where the O-ring is) and working downwards - #1 in the top row, #2, #3, #4, #5, #4.Please see my pictures of the first lamp in my kitchen to see the difference of sharp pinched petals and reversed order of petal rows, to see if you want your blossom to hang down or bloom upwards.Light Quality Note which may also help you in your choices - I took the suggestion from amazon below this product to buy the multi colored, remote control LED bulb, but I was disappointed by the very low level light it emits. I would recommend it very much if you wish to use this lamp only as some ambiance lighting feature in a dark room, like a night light. The different colors were very pretty, but even using the white on highest level it was still not going to fill my small kitchen with any type of relaxing working lighting.which is what I wanted.I wanted enough light so that when I sit at my kitchen table 3 feet away I could have more relaxing light than the overhead fixture, but still be able to sit in the evening with coffee and write a to-do list, groceries list etc easily. The LED light bulbs they recommend/feature won't allow for that type of light.Instead I came back and ordered from Amazon the Satco Energy Saver 13W (acts like a 60 watt and 4100k) CFL 4 pack of bulbs, and I am very happy with the light I get from them. So far they stay cool enough I don't need to worry about the lampshade melting.Its not summer yet where my kitchen can get quite warm bc no ac in it, but for now zero issues with bulb safety so far.Since LED's do save more money and remain cooler, I may try a LED bulb again but normal sized light bulb this time that would offer a bigger wattage light wise if I find the current bulbs plus hot summer do show some worry about too much heat for the plastic shade.I'm extremely happy with this shade - Very attractive!
A**A
Fun plug in lamp
I'm using this for both my daughter's room (doesn't have an overhead light) and an under-the-stairs closet that I'm turning into a reading nook. I looks SO fun! It was quiet a lot of work to set it up as it comes in a bunch of flat pieces that you put together - like an ikea origami lamp. Bank on 30-45 minutes to put it together. I used command hooks to keep thr wire out of the way eventually. I couldn't be happier!
M**N
Easy assembly and a nice hanging lamp
It came in a basic envelope and I wasn't impressed at first , so I took deep breath and assembled it ! Much to my surprise it was very easy and sturdy finished product . Had the ceiling hooks included to hang which made it even better .
A**L
Beautiful lotus hanging lamp
The media could not be loaded. This is a great lamp. I used a Wiz smart bulb 60 watt and it was enough to brighten up the left side of the room where I work. Added little video of assembling center cylinder. Only tricky part, for me.
R**N
At that price, I’m thrilled
The lamp looks quite lovely. I put in an amber bulb, because a regular bulb, even a soft white bulb, made the lighting too blue and harsh. The lamp is very white plastic, but with the warm bulb, it casts a nice glow.It was easy to put together, and, for that price, I think it looks great. If you look at it closely, it’s just cheap plastic, but hanging up, you can’t tell. I’m very pleased, because the only other lamps that appealed to me were at least $350.
J**N
LOVE IT
The media could not be loaded. I see what everyone was saying how it’s such a pain in the butt putting together. The pictures from other reviews really helped with putting it together because the instructions did not help at all. Besides that I love it!! I got a changing color light bulb with a remote from Meijers
J**
lotus light
This light was pretty easy to put together unlike others I bought. But my favorite part was it came with a light and it is anchored on the light really well. I love this light. I added a changing color light bulb in it and it looks fantastic
T**A
Pretty
This light works great, looks amazing but was a little tricky to put together. It looks gorgeous in my daughters room
A**R
Pretty. Easy.
I wanted some fun lighting for my daughter's room and this was a nice inexpensive option. You don't need to be a genius to assemble this, maybe just check a YouTube video, and having dexterous hands helps. As per another review I bought a color changing bulb for the fixture and my daughter loves it. Also having a remote or app to control the bulb is nice in case the toggle switch is in an inconvenient spot.
A**R
Magnificent piece of Art!
This is one of the most beautiful lamps I've seen, which totally makes up for the challenge of putting it together. It took 3 of us to figure it out as there are no instructions, only pictures of the parts. My 12 year granddaughter came to the rescue and completed the construction of this magnificent piece of art. We are thrilled with the end result.
A**R
Quick, easy, beautiful.
Love this light its exactly what I was looking for!!Would love to purchase a second one, but currently unavailable...
I**E
Surprisingly nice for such a low price!
Up close it may look a bit cheap but only if you stare really close. Once hung up, it makes a lovely accent to the room! I used a warm glow bulb and think it's perfect for the space. I needed more light above my desk for work and this certainly delivered.Assembly was a bit tedious, but I love puzzles and things so I didn't mind so much.
Trustpilot
1 month ago
1 day ago