🎧 Fix it fast, sound it better—your audio lifeline awaits!
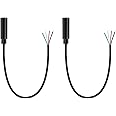
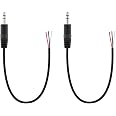
The Fancasee 2-Pack 3.5mm TRRS stereo male plug to bare wire pigtail cables are designed for quick and easy repair of headphones, microphones, and speakers. Featuring pre-stripped and pre-tinned wires, these 12-inch cables support both OMTP and CTIA wiring standards, ensuring broad device compatibility and hassle-free soldering.
J**M
I fixed it!!! Works great.
So, my daughter broke the plug off of my $70.00 gaming headset !!! I found this replacement part, and since it doesn’t need soldering - I bought it. This is step by step how I fixed it. Mind you, I’m a nurse and not a electronic repair person. It was fairly easy keeping in mind the tiny wires you have to work with, so, take your time. Don’t try to fix it if you’re under 18yo, ask a parent for help.Gather:-a lighter-scissors-little water bowl (just in case)-wet paper towel-shrink wire 3/32-3/64 (2mm-1mm)-electrical tape-cut the broken plug off and carefully splice the wire to expose the 4 wires inside.-On my headphone wires:Red - right speakerGreen- left speakerCopper - groundWhite - mic **this one, the white wire is wrapped with red/green skinny wires (these are for insulation to prevent static) just take it out of your way or cut it offYou will need about 1/2” of exposed wire in your headphone AND on the replacement part in order to twist them together. So, open a window, and burn (use a lighter) the ends of all 4 wires to remove color and expose the copper wires inside. Wipe the char clean with the wet paper towel. You should repeat the same thing on the replacement part b/c it comes not exposed enough in order to twist.Start with the outermost one. Look at the chart from the replacement part and correspond the color to location. They’re not interchangeable so connect correctly.My headphones were:Red - rightGreen- leftCopper - groundWhite - micOn replacement part:White -rightRed - leftBlack - groundGreen - mic-now, cut a piece of shrink wire, slightly bigger than 1/2” in order to cover exposed wires later. Feed onto wire and leave it at the end.-carefully twist the matched color/position wires. Twist several times, once secure, slide the shrink wire over the twisted portion and burn the outside of it. It will shrink so carefully give it a squeeze, careful it’s hot!! (I wore gloves)-repeat until all 4 are attached.-now, test the sound on your headphones by plugging into phone, iPad or game console. If it all works - GOOD JOB! Wrap all 4 wires with electrical tape to reinforce. It’s not pretty but works great.I’m really happy with this < 10.00 fix to my headphones. I took some pics but was unable to post here. Good luck!!
L**E
Fairly Good Quality
I used this wire to repair my headphones as the right ear was sudden'y cut one day. I cut off the damaged connector and soldered in this set. The jack itself is designed for headsets (headphones + Microphone), so this is the one to get for those headphones. it works as intended.
G**E
Good product
As advertised
A**N
don't waste your time
Not as cut and dry as it makes it seem. Not color coded the same as the headphones were.
D**E
Does what I needed
I had to replace the jack on my Logitech headset, and after some testing using my multi meter, found what wires needed to go to what. (they didn't match with what my headset was). Does what I needed and works great. Easy to solder.
A**M
NO GOOD FOR LOGITECH G432 HEADPHONES
I tried every combination. Did not fix my Logitech G432 headphones. Returned - waiting for refund.
R**L
Watch your colors
I bought these in an attempt to replace a Turtle Beach headset. I had two major problem. I don't know if these problems were specific to this product or generally. First the wire colors are different than the Turtle Beach headset I made a lot of mistakes trying to reverse which wire went where. The second problem is the wires are really small, especially the multicolored one. No idea if that's this brand or headphone wires in general.
W**S
Wire colors are for OMTP, not the modern CITA standard; Green is GROUND and Black is MICROPHONE
Fortunately I tested these on a breadboard before soldering, because the wire colors are not for the modern CITA standard, they are for the old OMTP standard. All that means is the green wire connects to the 3rd ring from the tip, and the black wire connects to the bottom ring. For CITA compatibility you need to swap mic and ground; green is ground and black is microphone. For OMTP the colors correspond as you would expect.Verify which standard your intended device uses and solder accordingly.
Trustpilot
2 days ago
3 days ago